

Disclaimer: This guide is intended for advanced users with technical knowledge. If you're unfamiliar with customizing your DNS records or don't know what they are, it's recommended that you seek professional assistance.
Gist allows businesses to send emails from their domain, improving the personalization and deliverability of their outbound emails. By default, emails sent via Gist use Gist's domains (for example, gistmail1.com, gistmail2.com, etc.). To send emails from your own domain instead (e.g., 'john@example.com'), you'll need to set up a custom domain on Gist.
Your email deliverability hinges upon your email marketing provider's reputation and domain. Although Gist maintains a high reputation and partners with top email service providers, you can set up your custom sending domain if your domain already has a strong reputation. This guide will walk you through the steps to set up a custom sending domain on Gist, including configuring SPF and DKIM records.
SPF and DKIM: Key to Email Deliverability
>Sender Policy Framework (SPF) guards against spammers by allowing email providers, such as Gmail, Outlook, and others, to verify if you are the real sender of an email. These service providers highly value and employ this protocol as a frontline defense against spammers and phishing attacks. Emails that fail the SPF verification can be flagged, sent directly to the recipient's spam folder, or even outright rejected, negatively impacting your email deliverability rate.
In parallel, DKIM is a mechanism that helps prevent domain spoofing through cryptographic authentication. It adds an encrypted signature to your emails that is unique to your domain. Email service providers verify this signature to ensure the email hasn't been tampered with during transmission and genuinely comes from your domain. If an email fails DKIM verification, like SPF, it may be marked as spam or completely rejected by the email service providers.
Setting up SPF and DKIM for your domain is highly beneficial for maintaining your domain's reputation and ensuring a high email deliverability rate. These security measures help establish your domain's authenticity and assure email service providers and recipients that your emails are legitimate and safe.
Set up custom sending domain
Step 1: Access settings
Navigate to Settings > Email > Email sending addresses in your Gist dashboard.
Step 2: Adding an email address
Click the "Add New Address" button to enter your email display name and custom email address. The name you provide here will be displayed to your users as the sender.
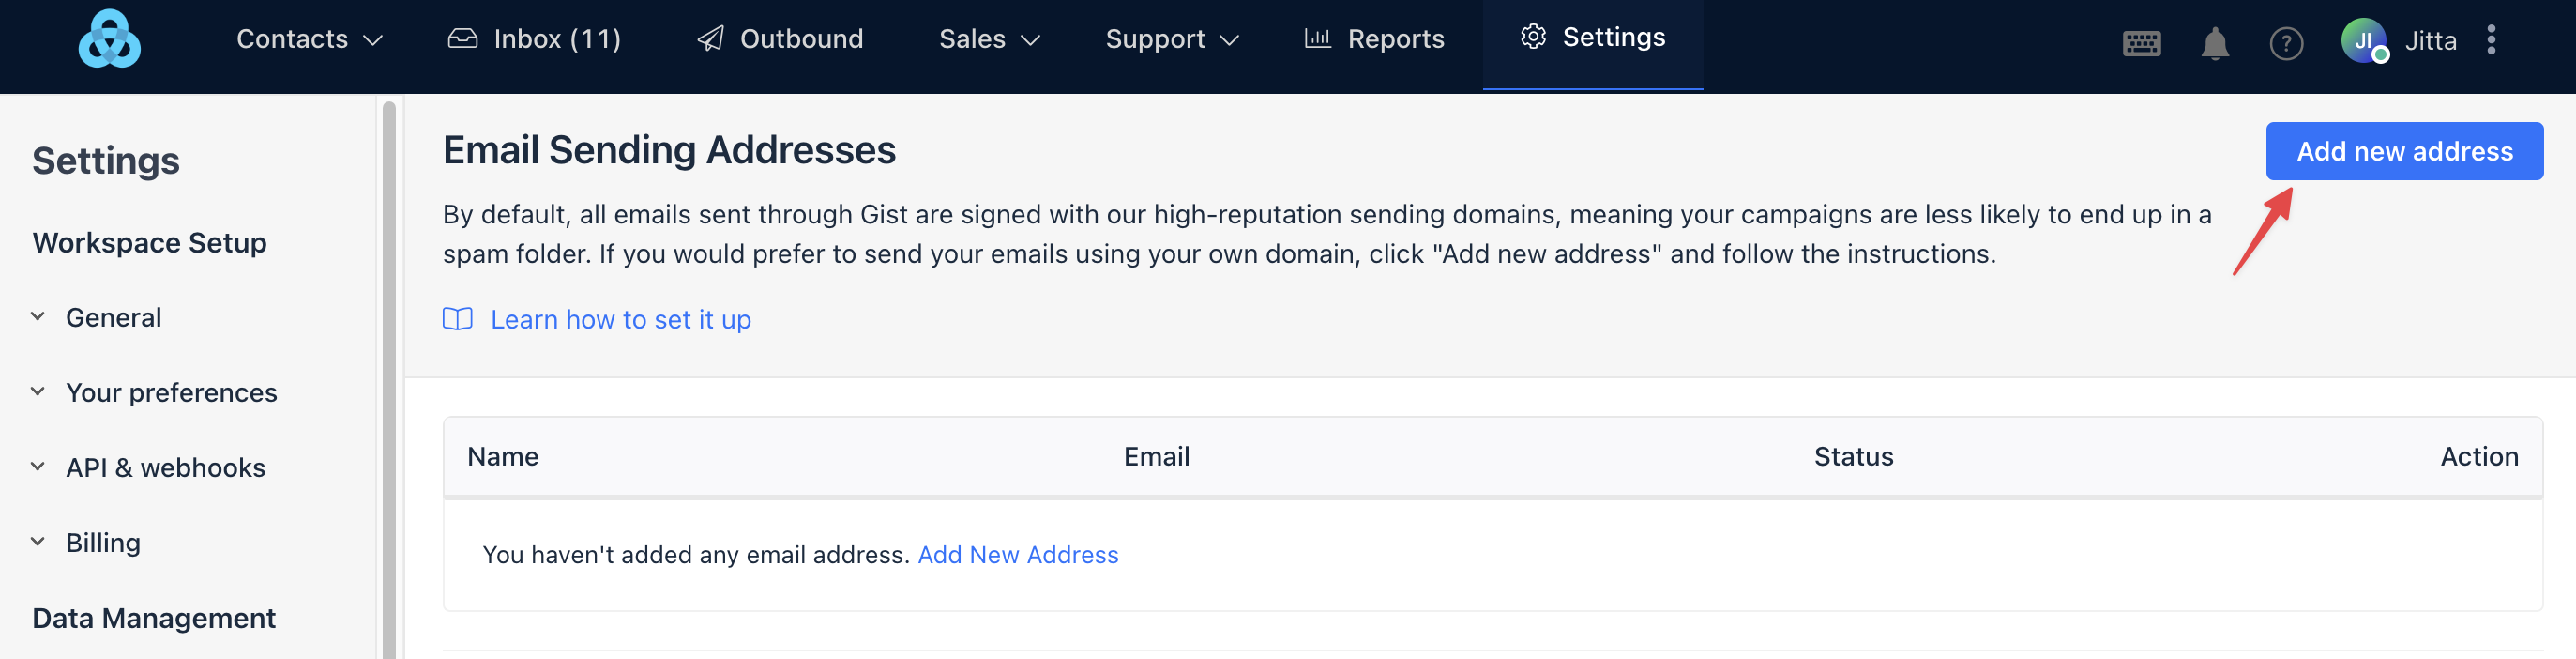
Important: Three conditions must be met to add the email address successfully.
- The domain of the email address you add must match exactly with the domain added in the workspace here.
- You must have a Gist account with the same email address.
- The email address must be valid and currently in use.
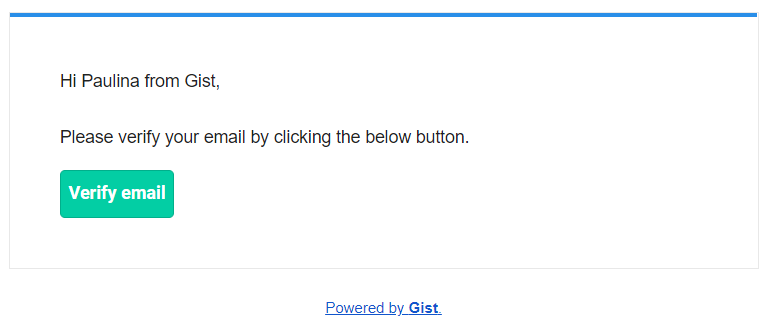
Step 3: Verify your email
Upon adding your email address, a verification email will be sent to that address. You need to complete the verification process.
Step 4: Configure your DNS records
This is a critical step where you configure your DNS records. This is done through your host or domain registrar (e.g., godaddy.com, cloudflare.com).
After verifying your email address with Gist, you'll receive a list of TXT records to add to your DNS settings. The process varies depending on your DNS provider, but here are the basic steps:
- Navigate to the TXT section within the DNS editor.
- Click "add" to create a new TXT record.
- Set the hostname to "gist.yourdomain.com".
- Fill in the TXT Value field with your domain record ("gist.yourdomain.com").
- Save changes.
You'll also need to set up MX records with the following details:
- The record type should be "MX."
- The hostname should be "gist.yourdomain.com" or "gist".
- The priority should be set to 10.
- The MX record should be set up as mx.sendgrid.net.
In addition, you should set up your SPF record with the following records:
v=spf1 include:sendgrid.net ~all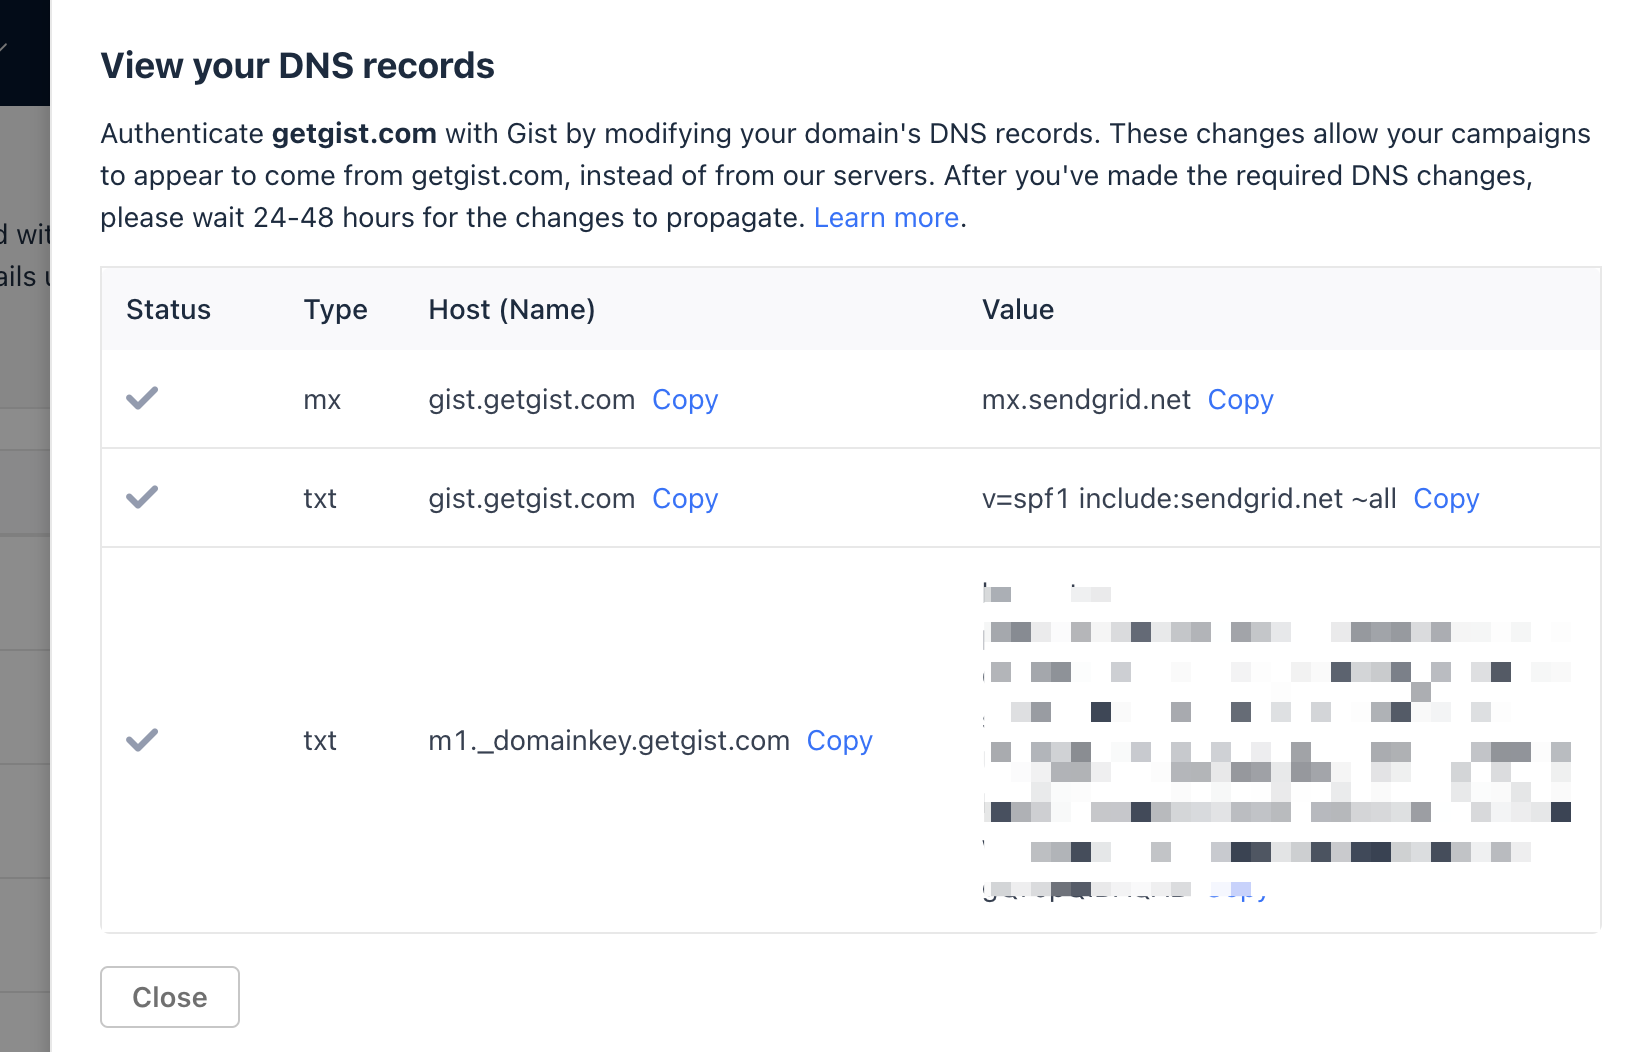
Please note that some services automatically add the domain to the sub-domain, which can lead to verification failure if you've already added the domain. If this is the case, input "gist" instead of "gist.example.com". The specifics can be found in your domain provider's documentation.
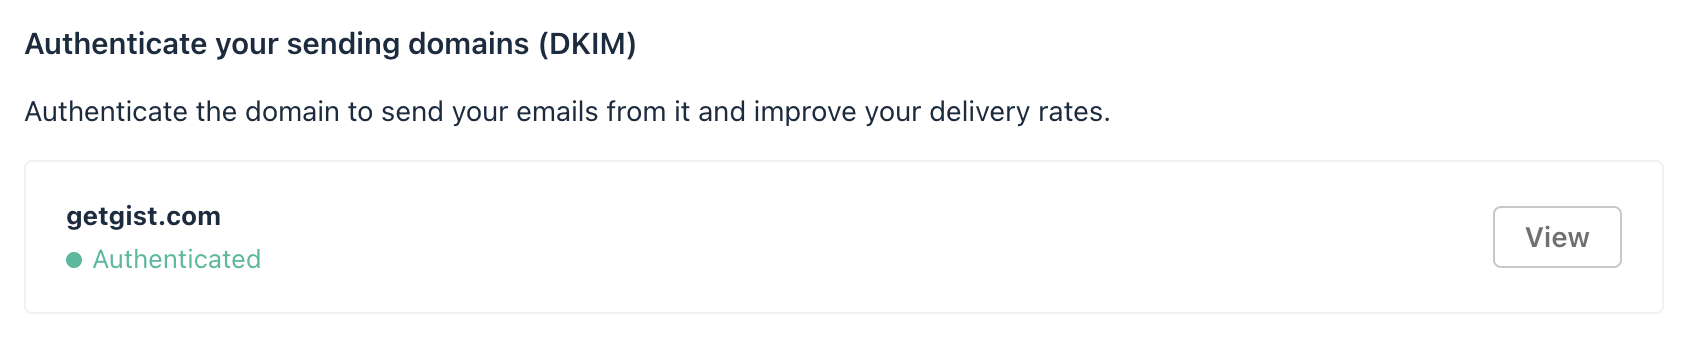
The time it takes for the DNS records to update can vary between 24 and 48 hours or less if you're using Cloudflare. After updating your DNS records, click the "Verify" button in Gist. Once verification is complete, your domain will be labelled as 'Authenticated', and you can start sending emails from your own domain.
Feel free to repeat steps 1 through 3 for each additional email address under the domain you wish to add to your workspace. If you're planning to add an email address from a new domain, it will be necessary to complete step 4 again for this new domain.
Troubleshooting
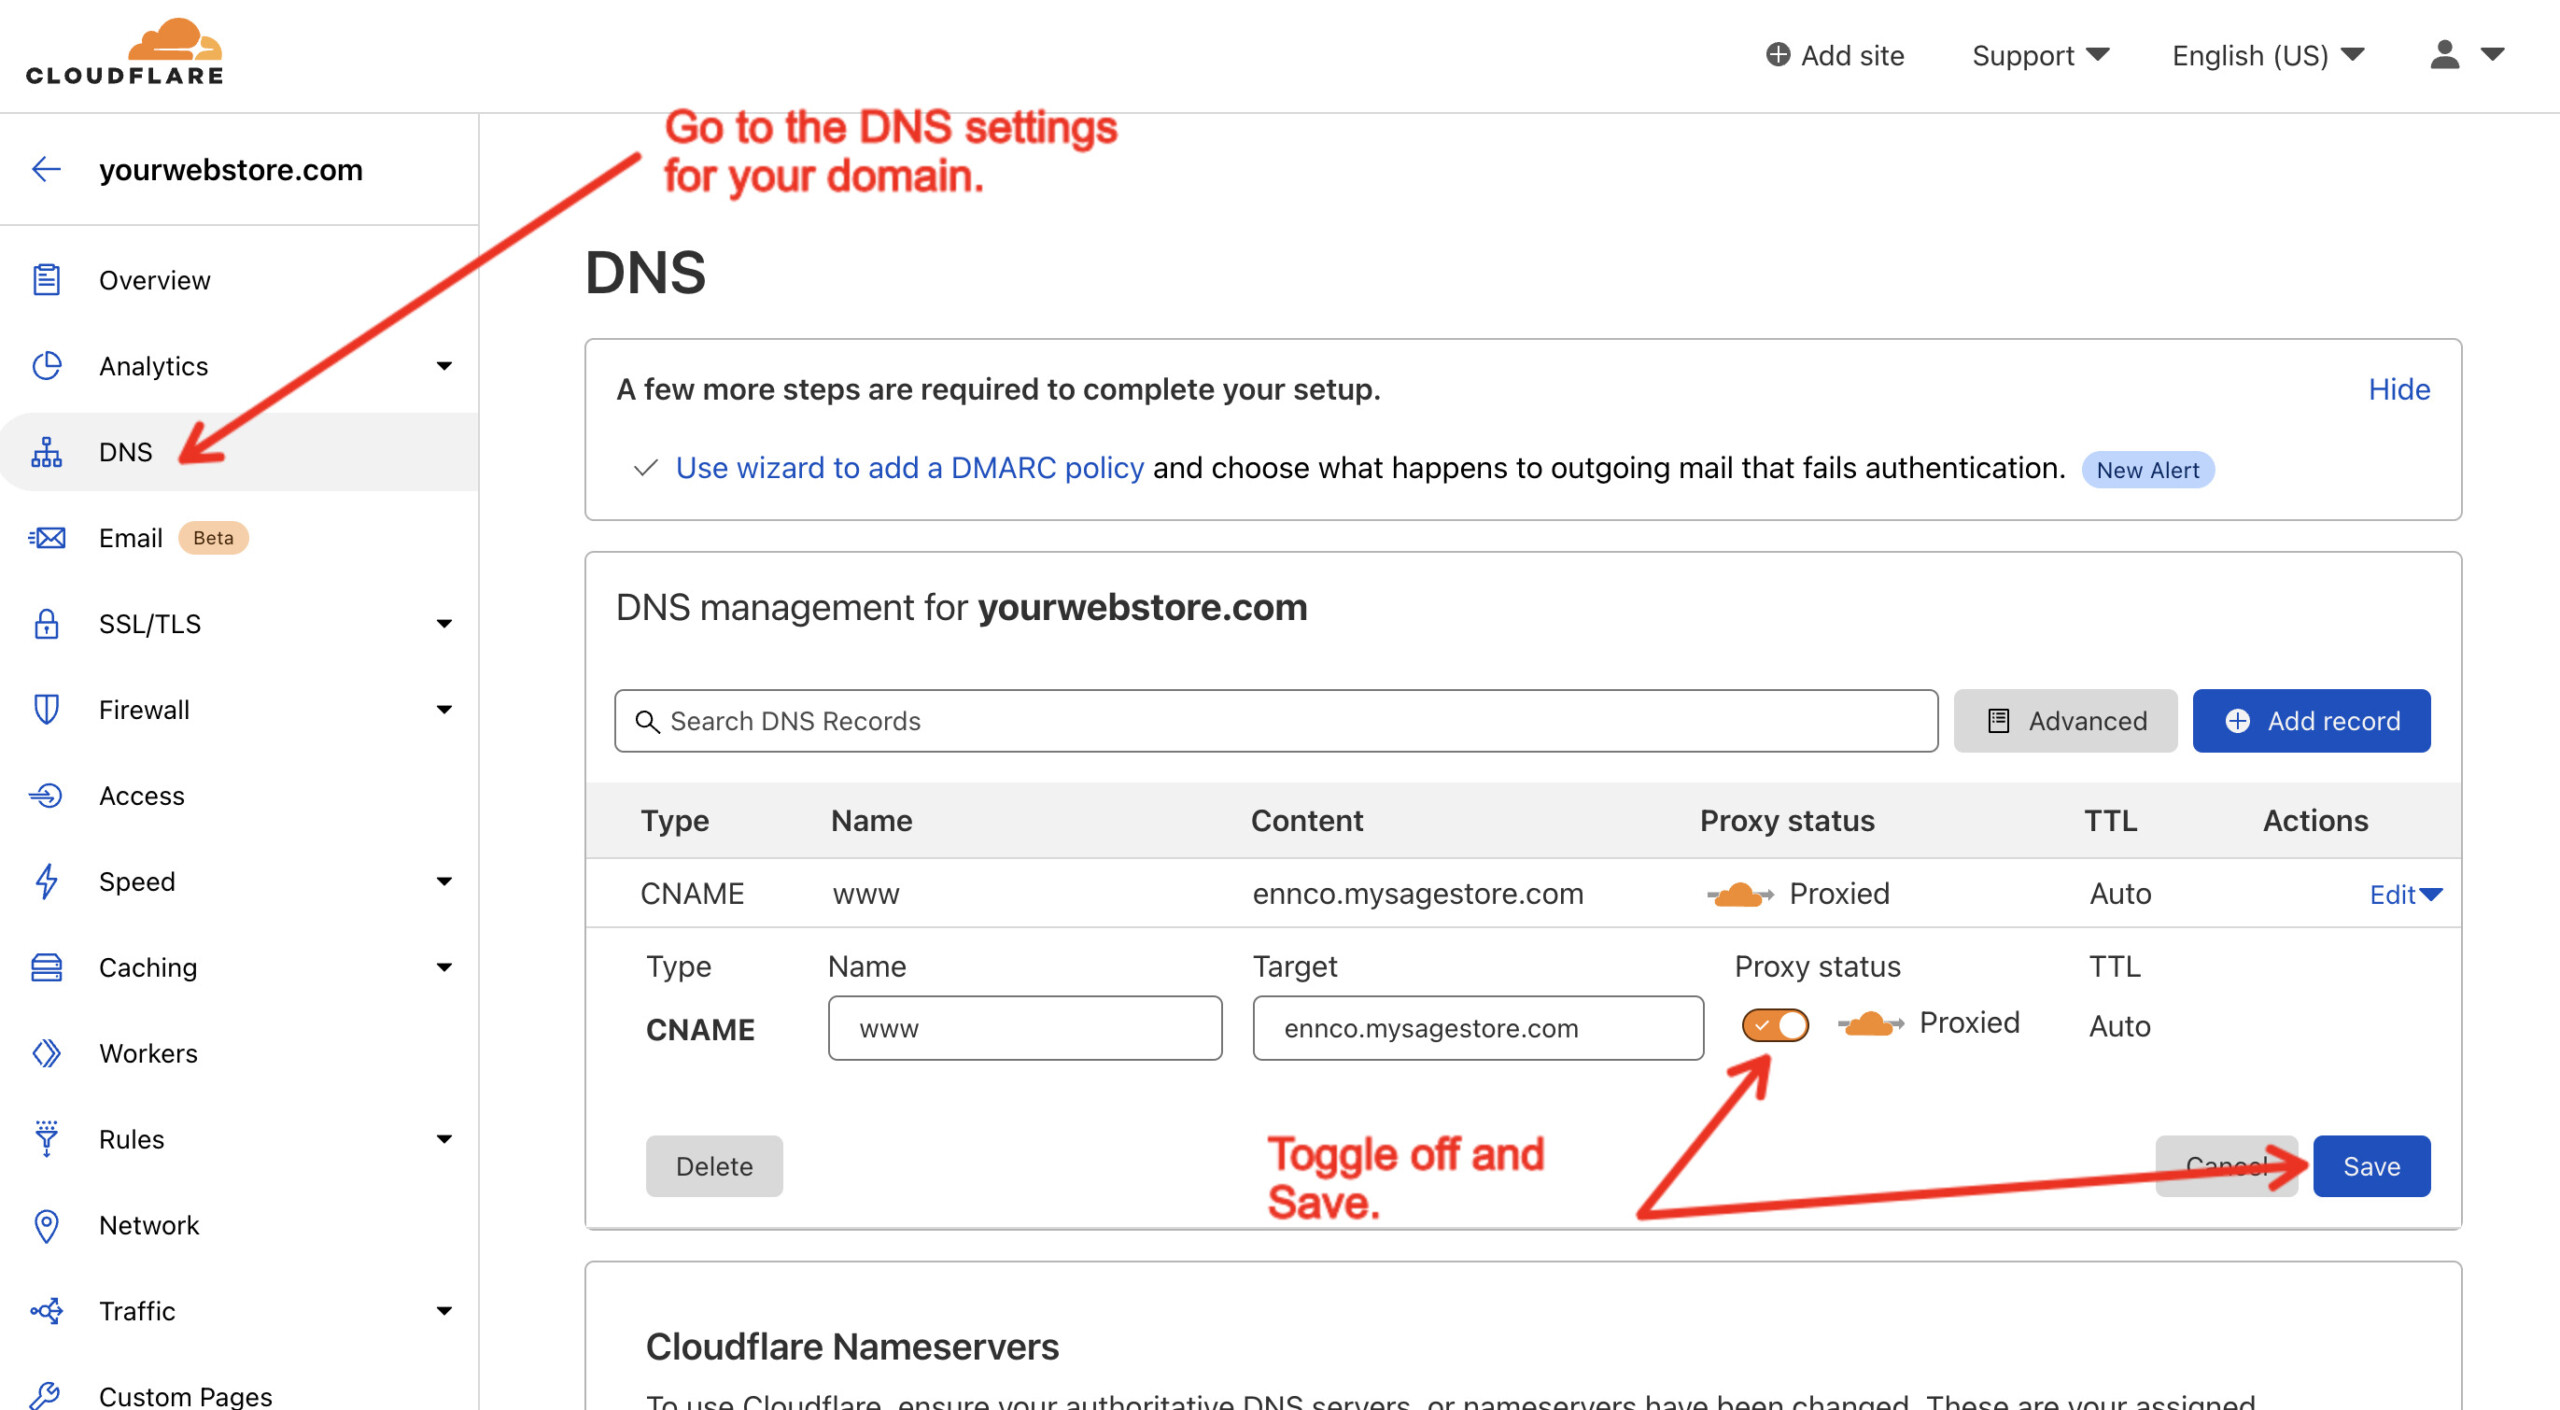
If you're using CloudFlare and your CNAME records remain unverified in Gist, check the following:
- Ensure CNAME flattening is disabled for the CNAME record (Cloud icon should be grey).
- Set the CNAME record to "DNS only", not "Proxied".
Common Questions
Q: What are SPF and DKIM records?
SPF (Sender Policy Framework) and DKIM (DomainKeys Identified Mail) are email authentication methods that help protect your domain from being used for email spoofing, phishing, and other malicious activities. They add credibility to your emails and help improve your email deliverability.
Q: How does setting up SPF and DKIM records improve email deliverability?
SPF and DKIM records add credibility and authenticity to your emails. Email service providers like Gmail, Outlook, and others verify these records. Emails passing these verifications are less likely to land in spam folders, thus improving your overall email deliverability rate.
Q: How difficult is it to set up SPF and DKIM records?
Setting up SPF and DKIM records involves a few steps that need to be performed in your DNS settings. While the process is technical, our step-by-step guide is designed to walk you through it. If you're uncomfortable making these changes, you should consider hiring a developer or a technical expert.
Q: How long does it take to reflect changes in SPF and DKIM records?
The time for changes to take effect can vary depending on your DNS provider, but typically, it can take 24 to 48 hours. Some providers like Cloudflare might update the records within a few minutes.
Q: I've set up my SPF and DKIM records. How can I check if they're working correctly?
After setting up the records, you can verify them within your Gist settings. If the verification is successful, your domain will be labeled as 'Authenticated'. Online tools like Mail Tester can also check your SPF and DKIM records.
Q: What happens if I don't set up SPF and DKIM records for my domain?
If you don't set up SPF and DKIM records, your emails may lack the necessary authenticity checks many email service providers use to filter spam. As a result, your emails may not reliably reach your recipients' inboxes and could end up in spam folders, reducing your email deliverability.
Q: Do I need to set up SPF and DKIM records for each email address I use with Gist?
No, you only need to set up SPF and DKIM records once for each domain you use. Once the domain is verified, you can add multiple email addresses under that domain in Gist without repeating the verification process.
Remember, this guide is intended for advanced users. If you have any doubts or face any difficulties, don't hesitate to ask for professional help. Happy emailing!
Need Help?
If you have any questions about setting up custom domains, contact support via chat in the lower right corner.