

Custom Bots enhance your team's efficiency by automating initial customer interactions, answering queries, and even helping with lead qualification. This guide will take you through the step-by-step process of creating custom bot flows, elaborating on their benefits.
Why Custom Bots?
Custom Bots, unlike humans, work tirelessly around the clock. They can start conversations proactively, provide instant and accurate responses, and automate a significant chunk of your team's responsibilities. Their design process is user-friendly, allowing you to create a bot within minutes using the bot builder's visual canvas.
The bot builder lets you chart out simple paths for your customers to follow and set up actions that automate tasks, such as assigning customers to the right teams.
Creating a Custom Bot
To create a custom bot:
- Navigate to Outbound > Messages > Bots.
- Click on the New Bot button and give your bot a name.
- Choose from the templates or create your own from scratch.
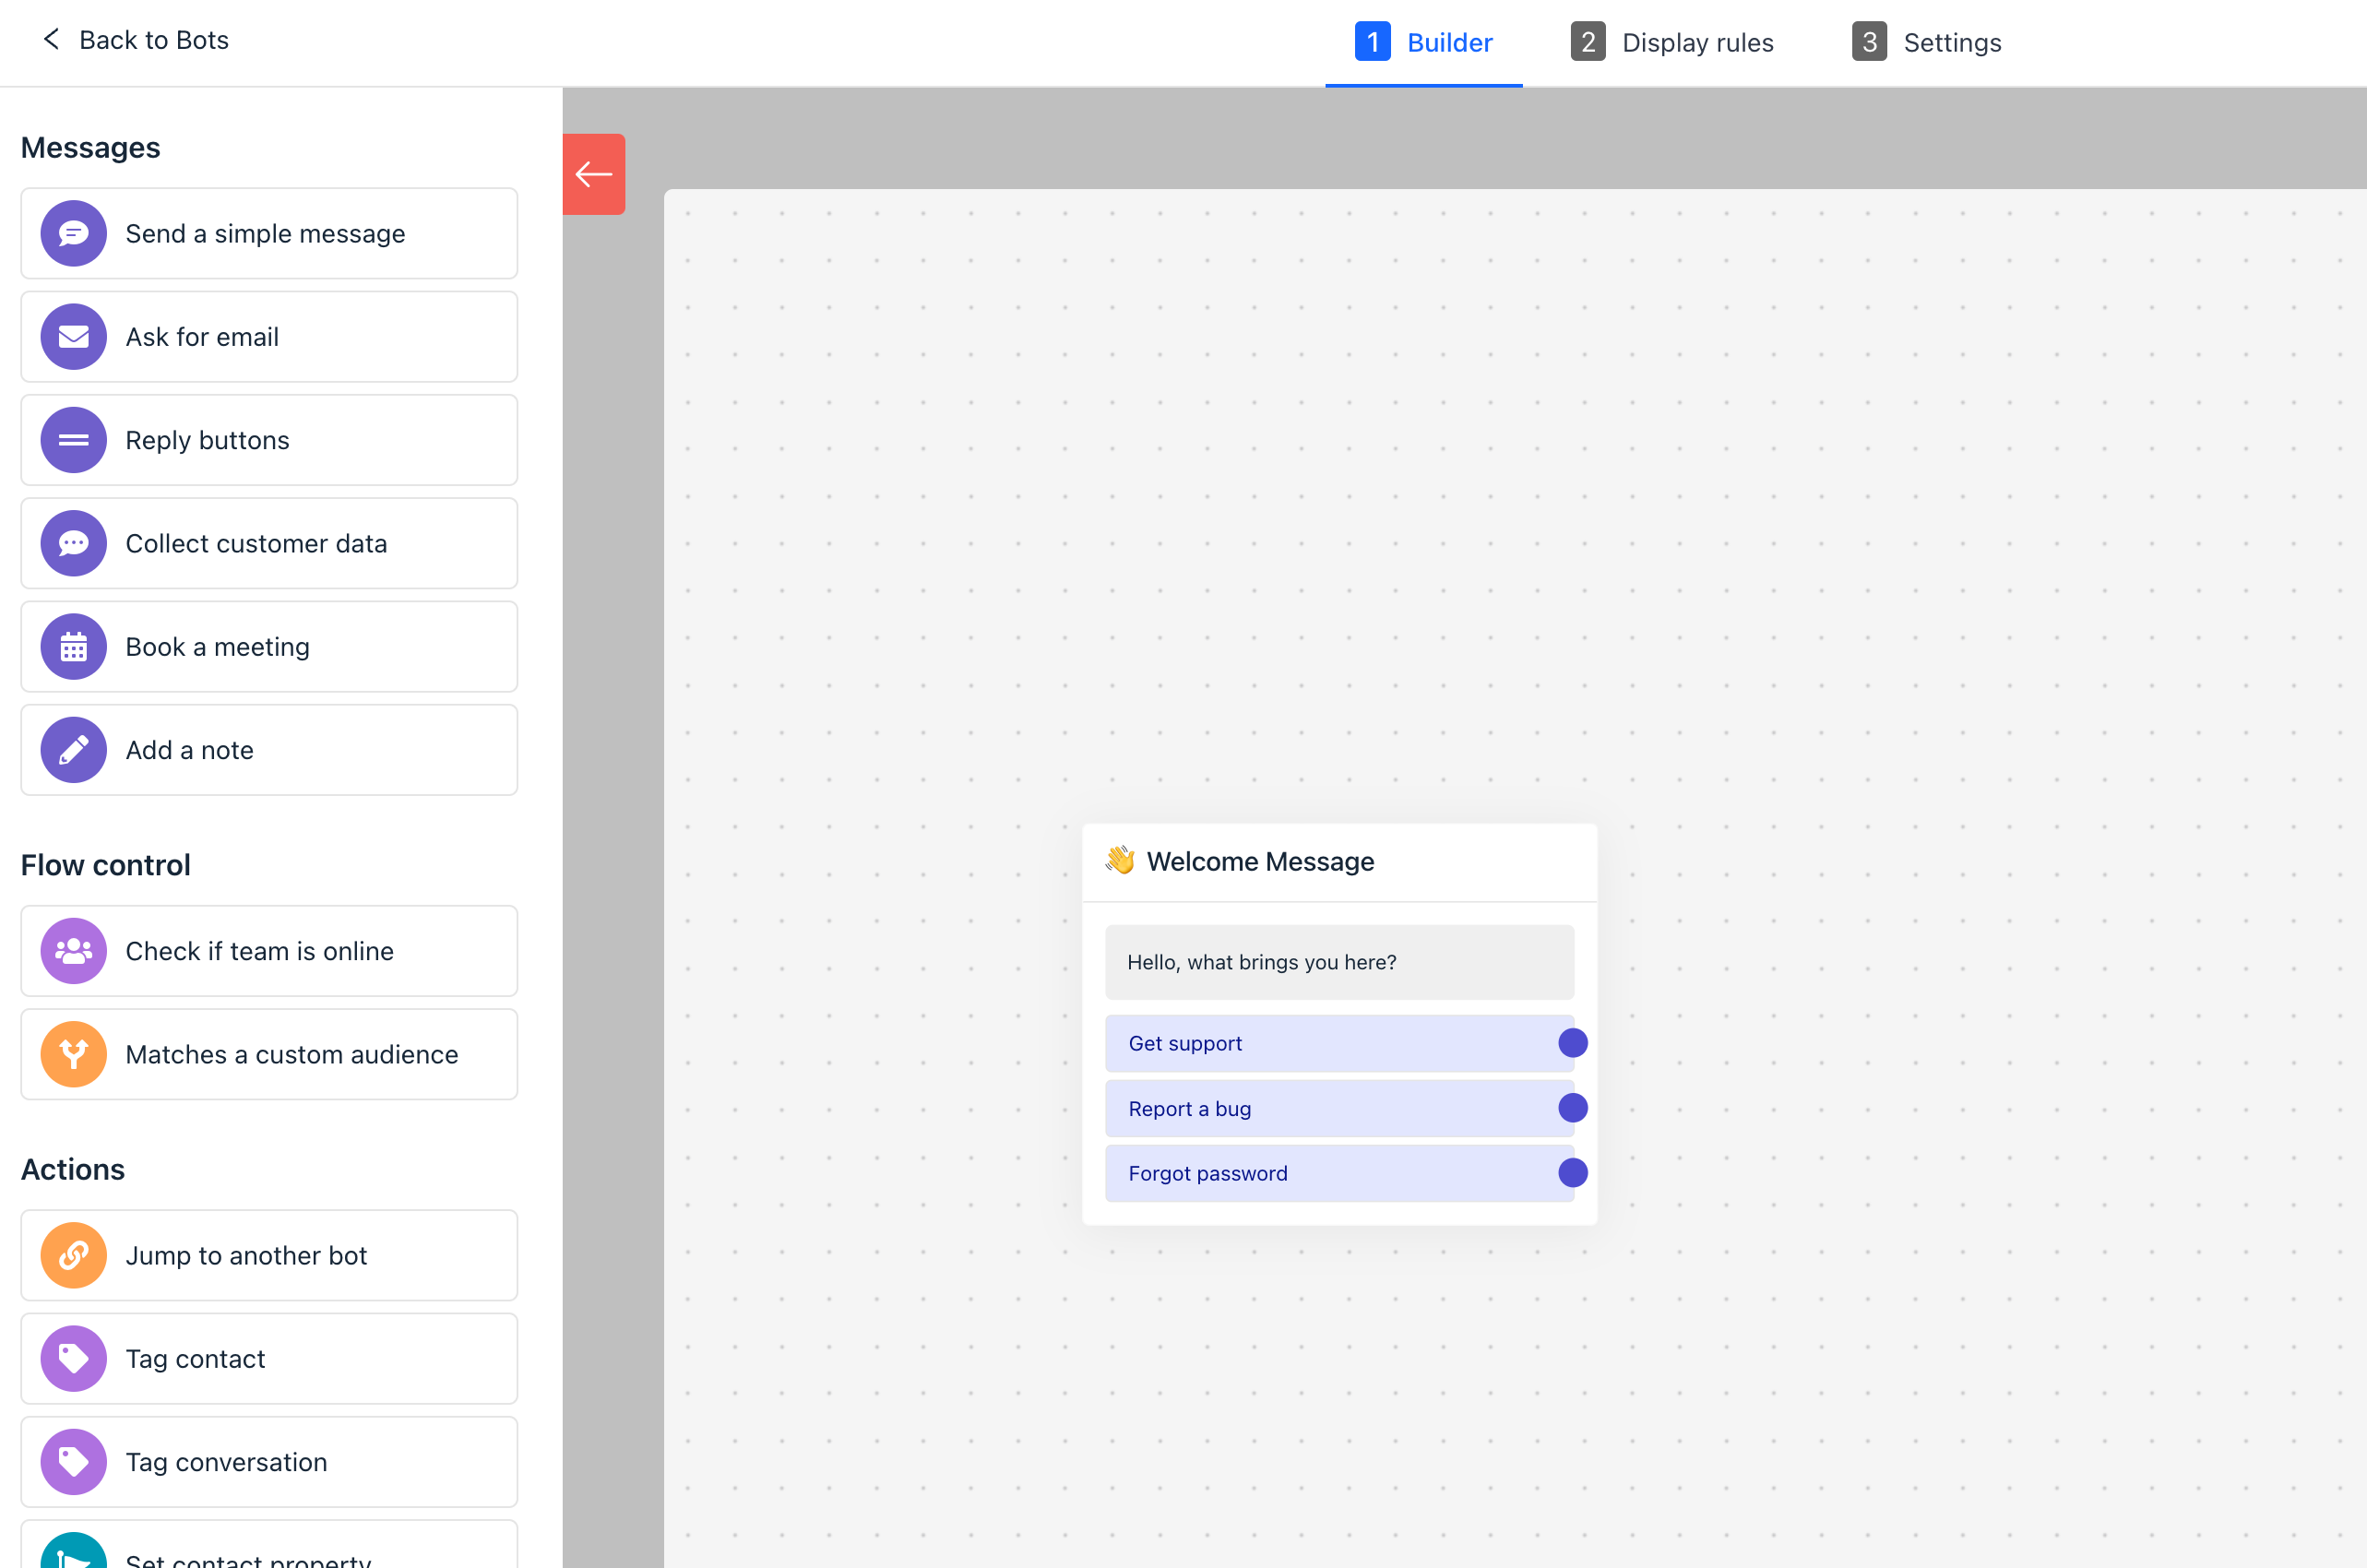
After choosing a template, you'll be directed to the bot builder. For a deeper understanding of its working, refer to our bot builder UI guide.
Setting Up the Welcome Message
The welcome message is the first interaction your customers will have with your bot. This is where you can ask multiple-choice questions and get customers on the right track.
To edit the welcome message:
- Hover over the message block and click on the pencil icon on the top-right corner.
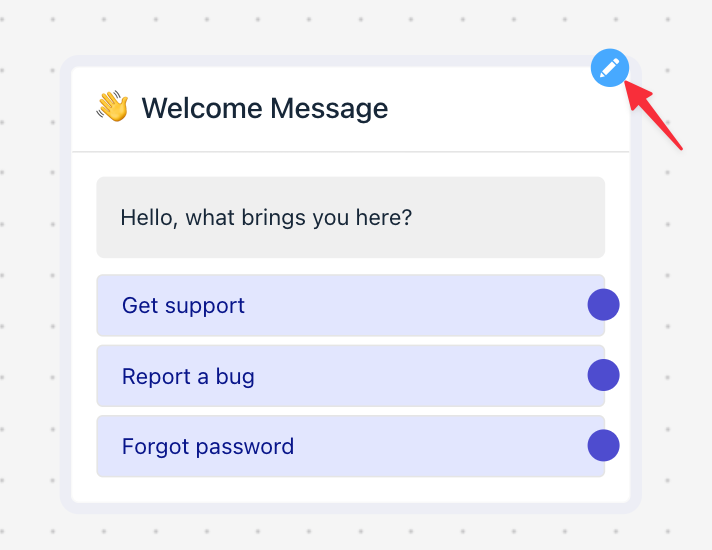
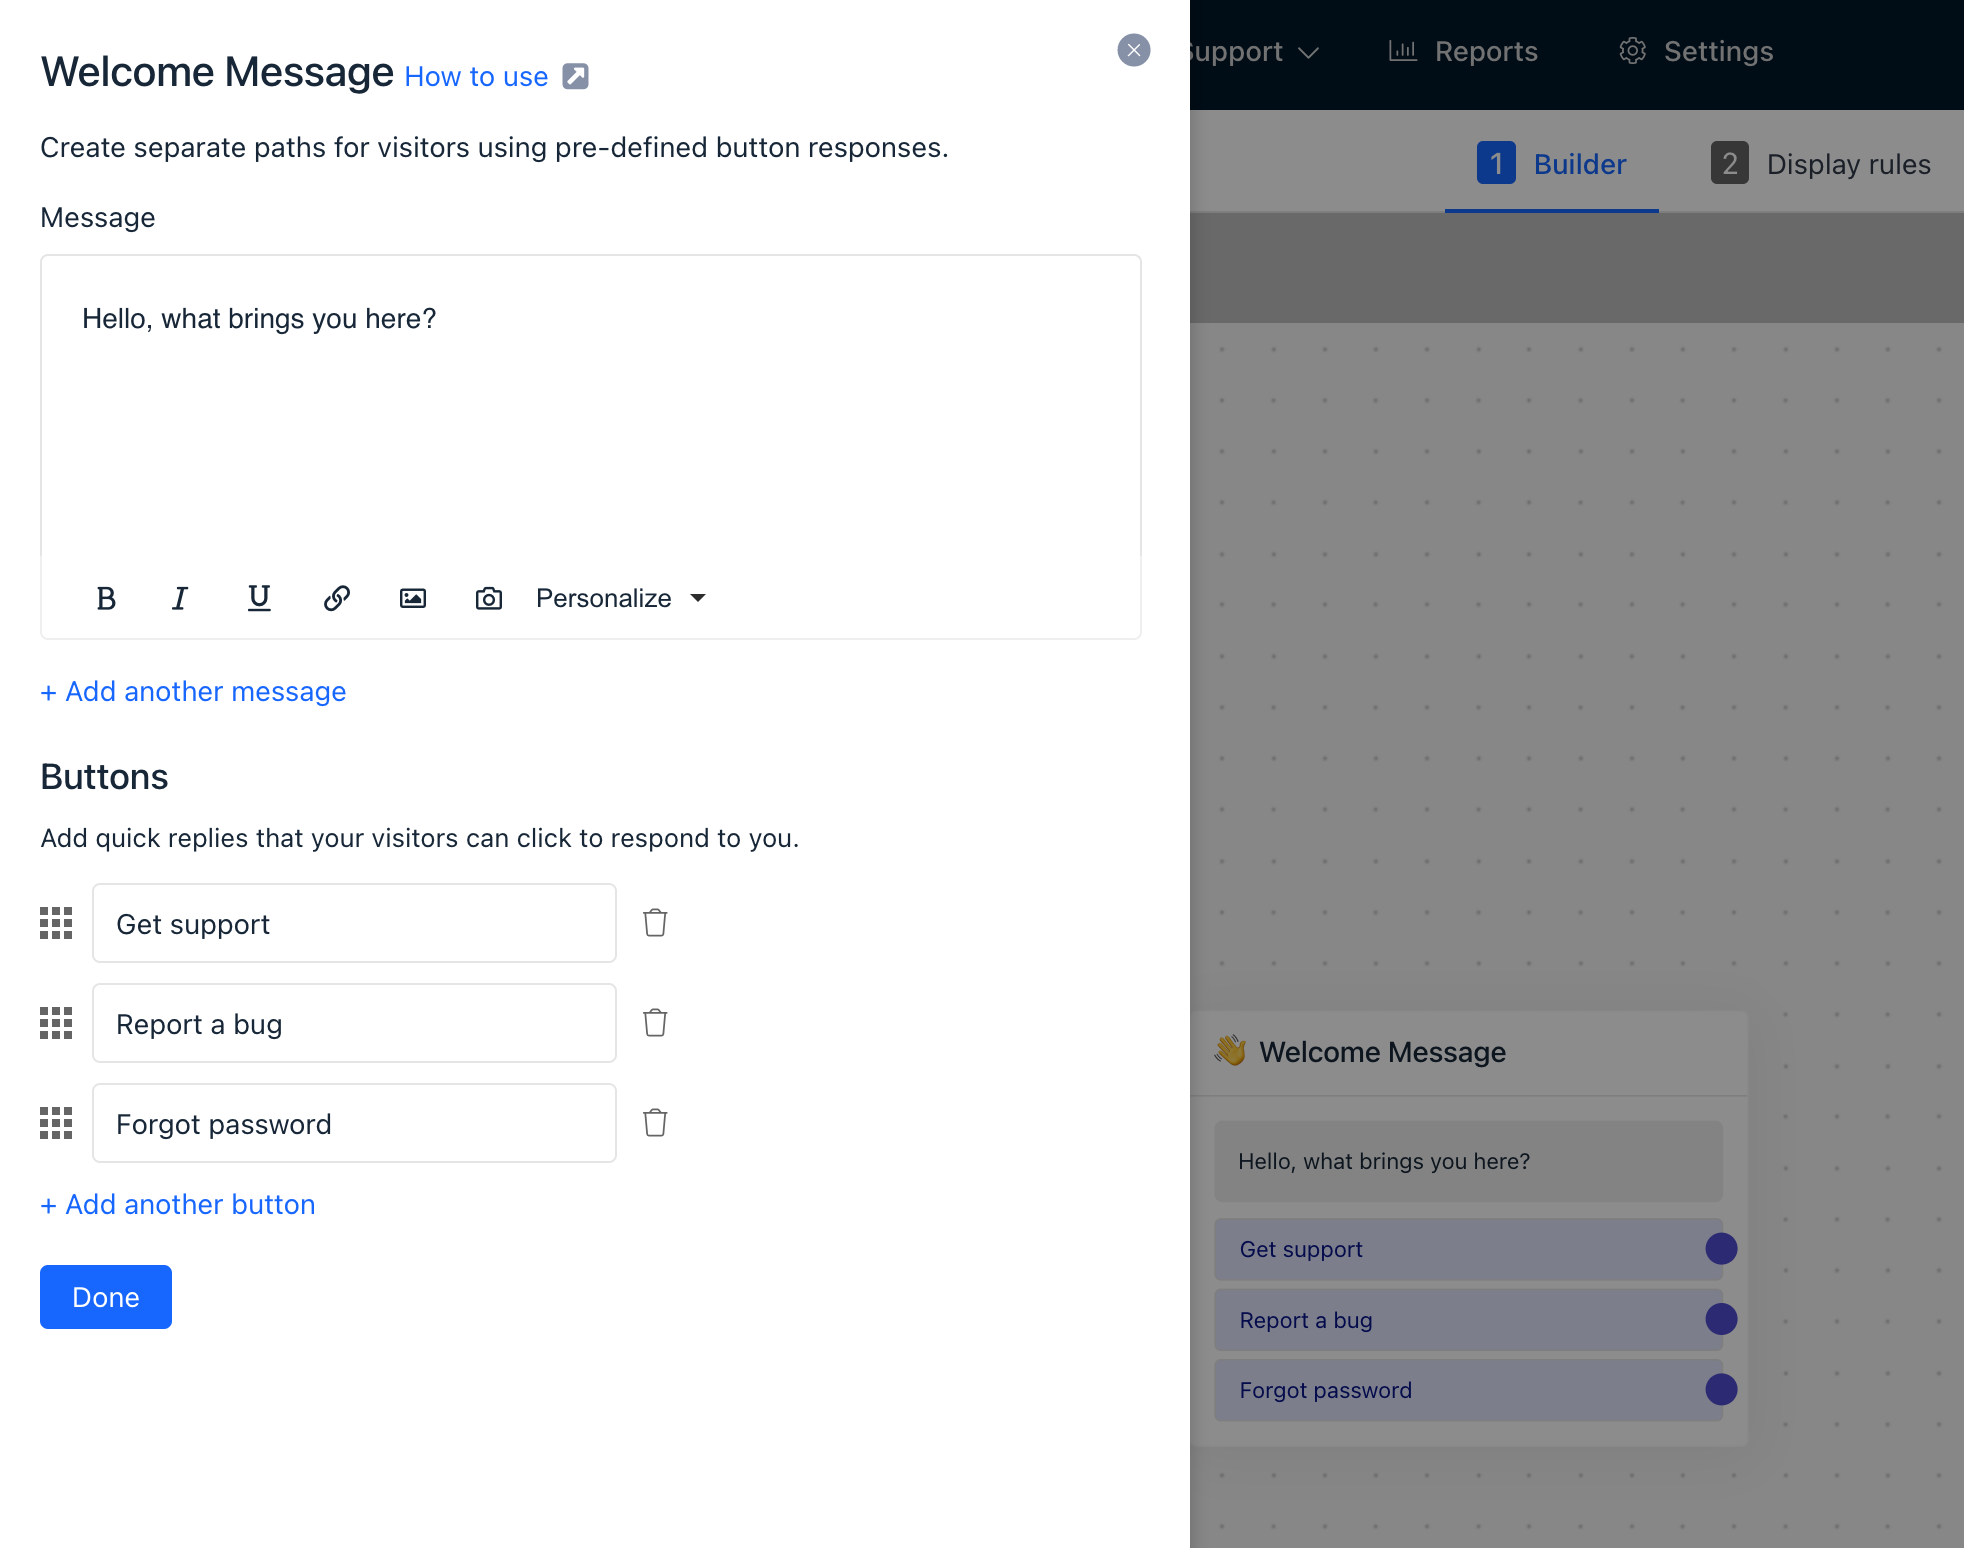
- In the Side panel, customize your message, adjust the buttons as per your needs, and then click Done.
Adding Your First Sequence
To add more sequences to your welcome message:
- Drag and drop the desired block from the left-side panel into your bot flow.
You can choose from a variety of message, flow control, and action types to populate your bot flow:
- Send a simple message
- Ask for email
- Reply buttons
- Collect customer data
- Collect customer reply
- Show expected reply time
- Book a meeting
- Add a note
Adding Conditional Paths
Branches, or conditional paths, add depth and versatility to your bot flow. They let you define conditions that dictate the conversation's next step.
![Conditional Paths Screenshot]
You can proceed to another path using:
- Reply buttons
- Team online
- Branches
Adding Actions
There are several conversation actions you can add to your path:
- Jump to another bot
- Pass to Support bot
- Tag contact
- Tag conversation
- Set contact property
- Set conversation property
- Assign conversation
- Snooze conversation
- Close conversation
- Mark as priority
- Disable customer reply
Setting Display Conditions
Under the Display Rules tab, you can determine when and where your bot will appear on your website pages.
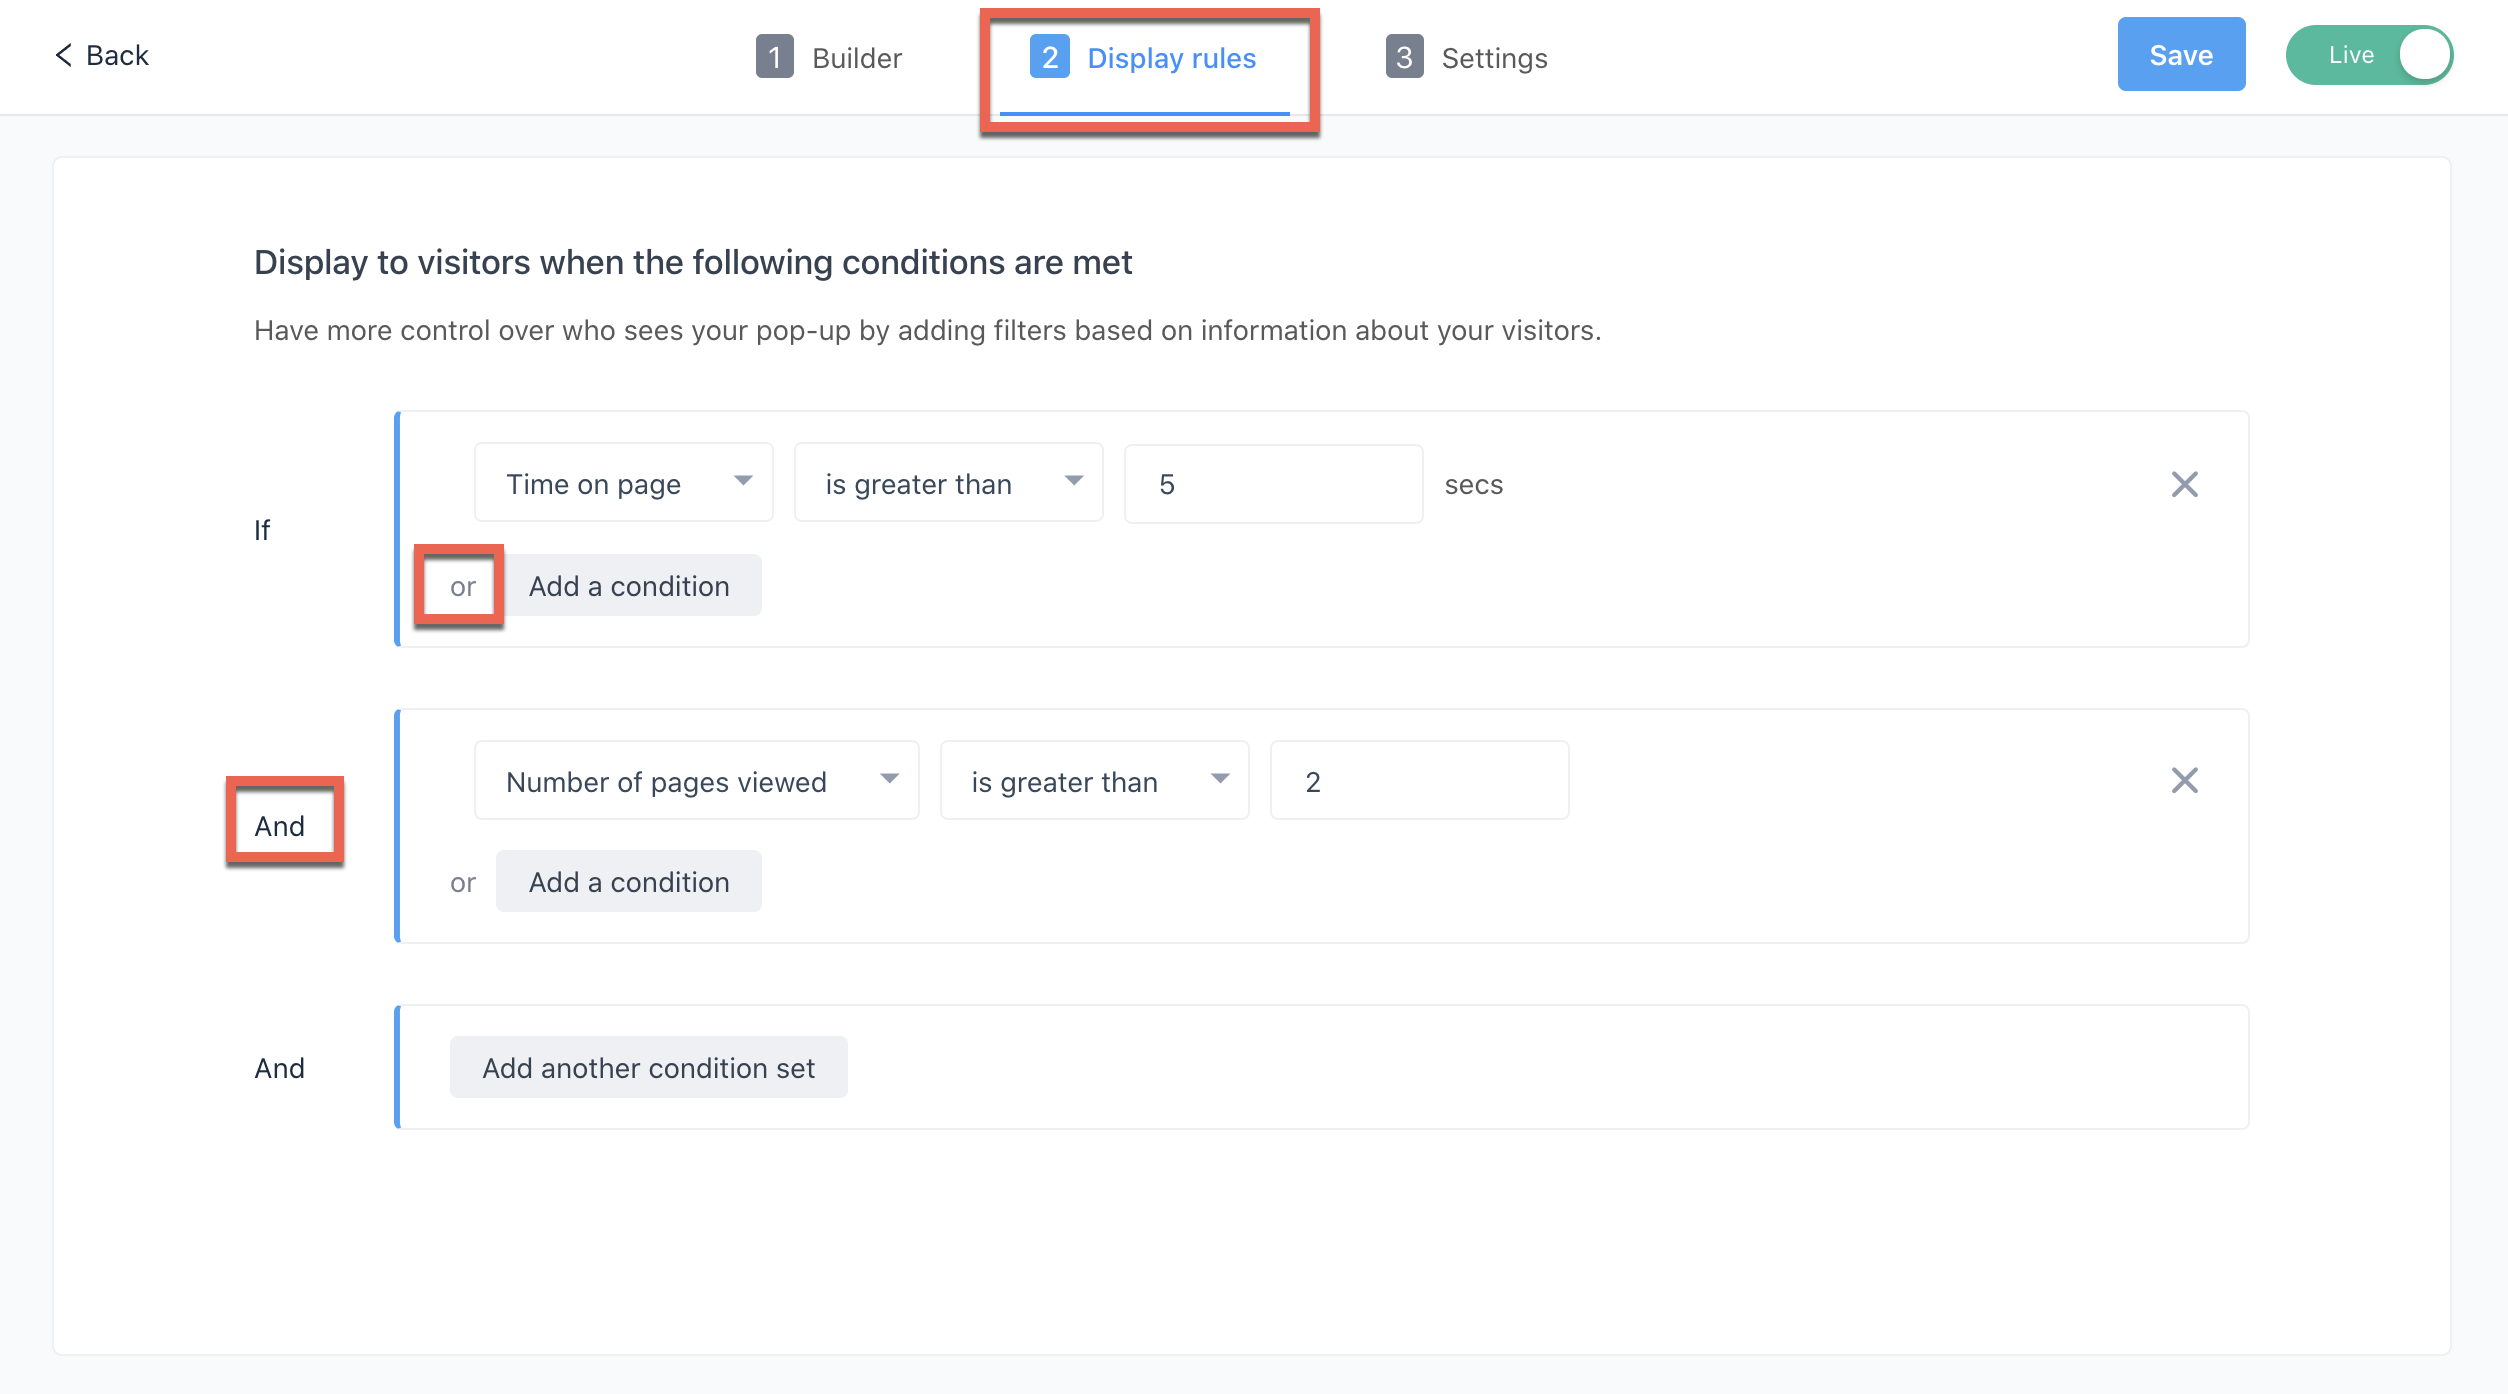
For example, to display your bot when a visitor has been on a page for over 5 seconds and viewed at least three pages on your site, you can set the following display rules:
- Display when Time on Page is greater than 5 seconds.
- Display when Number of Pages Viewed is equal to or greater than 3.
Bot Settings
Under the Settings tab, you can:
- Update your bot's name (for internal reference).
- Enable Gist link to allow website visitors to trigger the bot by clicking a button or link.
- Set a goal condition for the bot flow to measure its impact and conversion accurately.
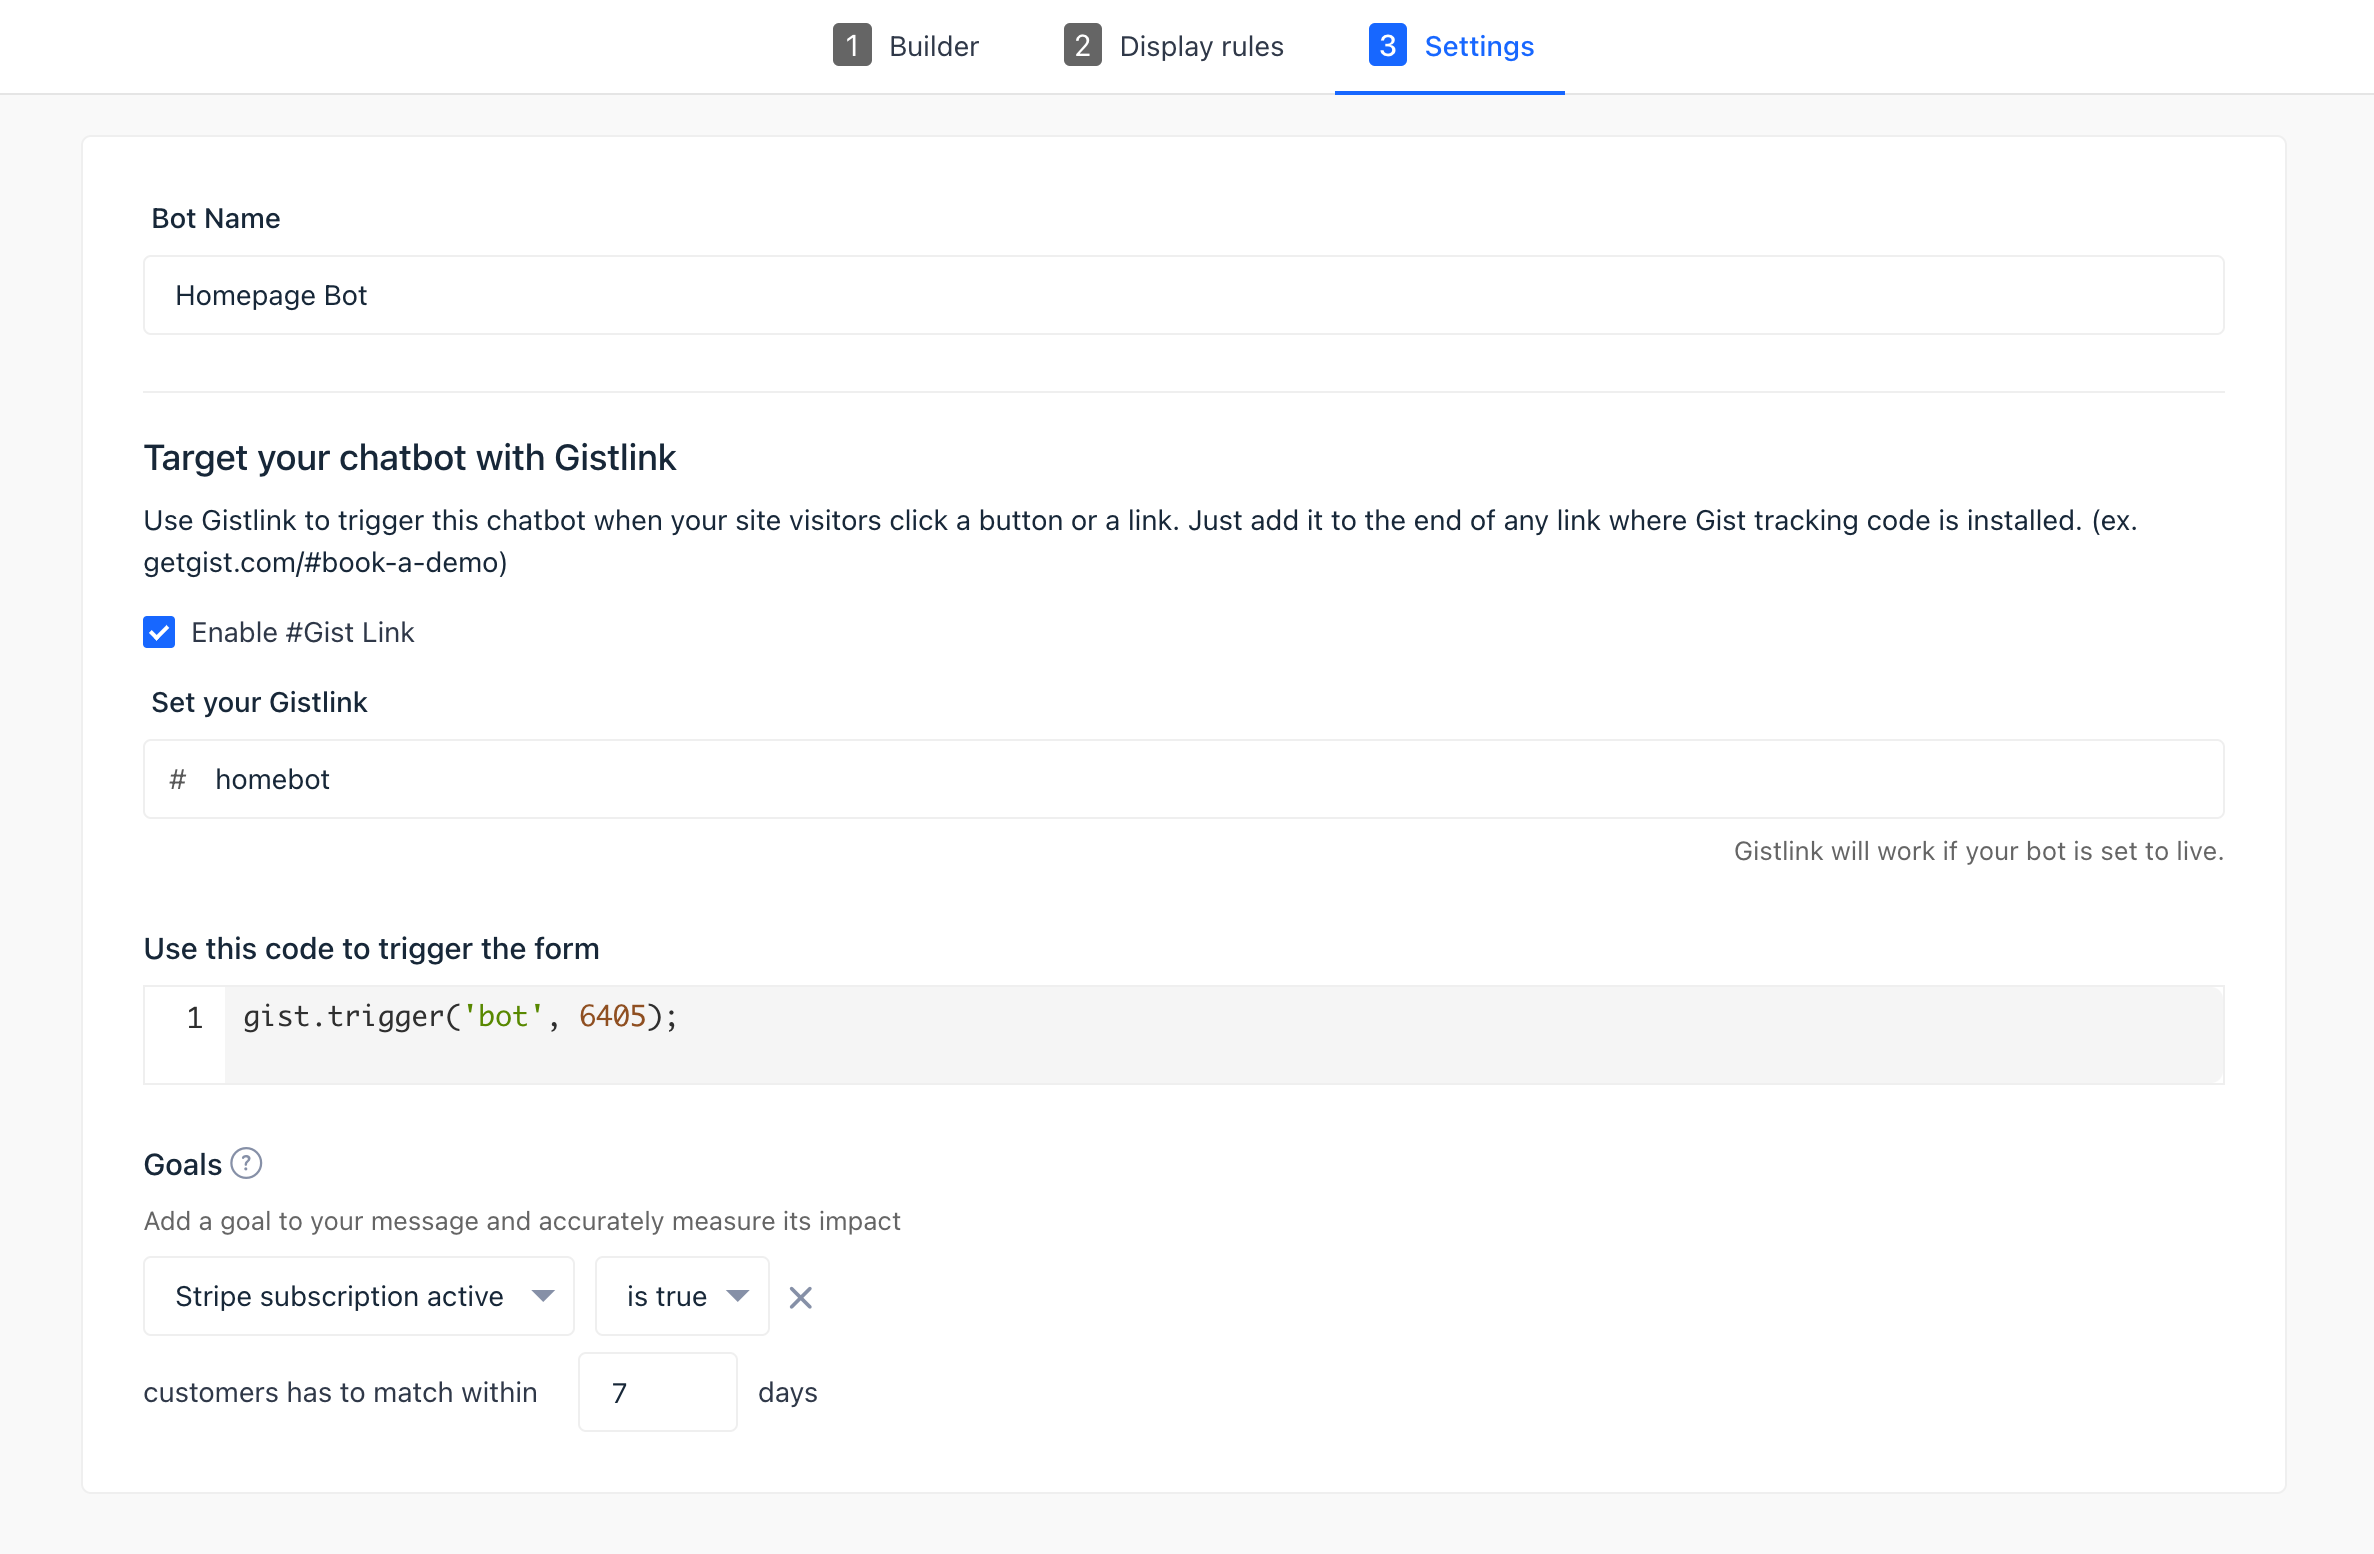
Triggering a Chatbot on Button Click
In your chatbot's targeting settings, you can create a unique Gist Link like "http://example.com/#chatbot". You can then set this link as the redirect path for a button on your site. As a result, the chatbot will be triggered when the button is clicked.
Once your bot is live on your website pages, visitors can start a conversation with it. You can respond to incoming messages in your conversations inbox or analyze your bot's performance.
Creating custom bot flows may initially seem complex, but with these guidelines, you should be well on your way to automating your customer interaction and elevating your service level. Happy bot-building!
Need Help?
If you have any further questions, please start a Live Chat. Just "Click" on the Chat Icon in the lower right corner to talk with our support team.