

NOTE: This guide is specific to installing Gist on your WordPress site. If your website is built on other platforms, we recommend checking the specific installation guide for step-by-step instructions.
The Gist All-In-One Marketing - Live Chat, Popups, Email WordPress plugin provides an easy way to connect your WordPress site with your Gist workspace. This powerful tool allows you to engage with your website visitors and customers in real-time. This step-by-step guide will walk you through the process of installing and setting up the Gist WordPress plugin.
Prerequisites
Before we start the installation process, make sure that:
- Your website or blog is using a WordPress.org install or is on the WordPress.com Business plan.
- You have admin access to your WordPress site.
- Your WordPress version is 4.0 or higher.
- Your PHP version is 5.6 or higher.
- The wp_head function is present in your WordPress theme’s header file (header.php).
If you meet all of these requirements, you're ready to install the Gist WordPress plugin!
To watch an overview of this process, check out the video below:
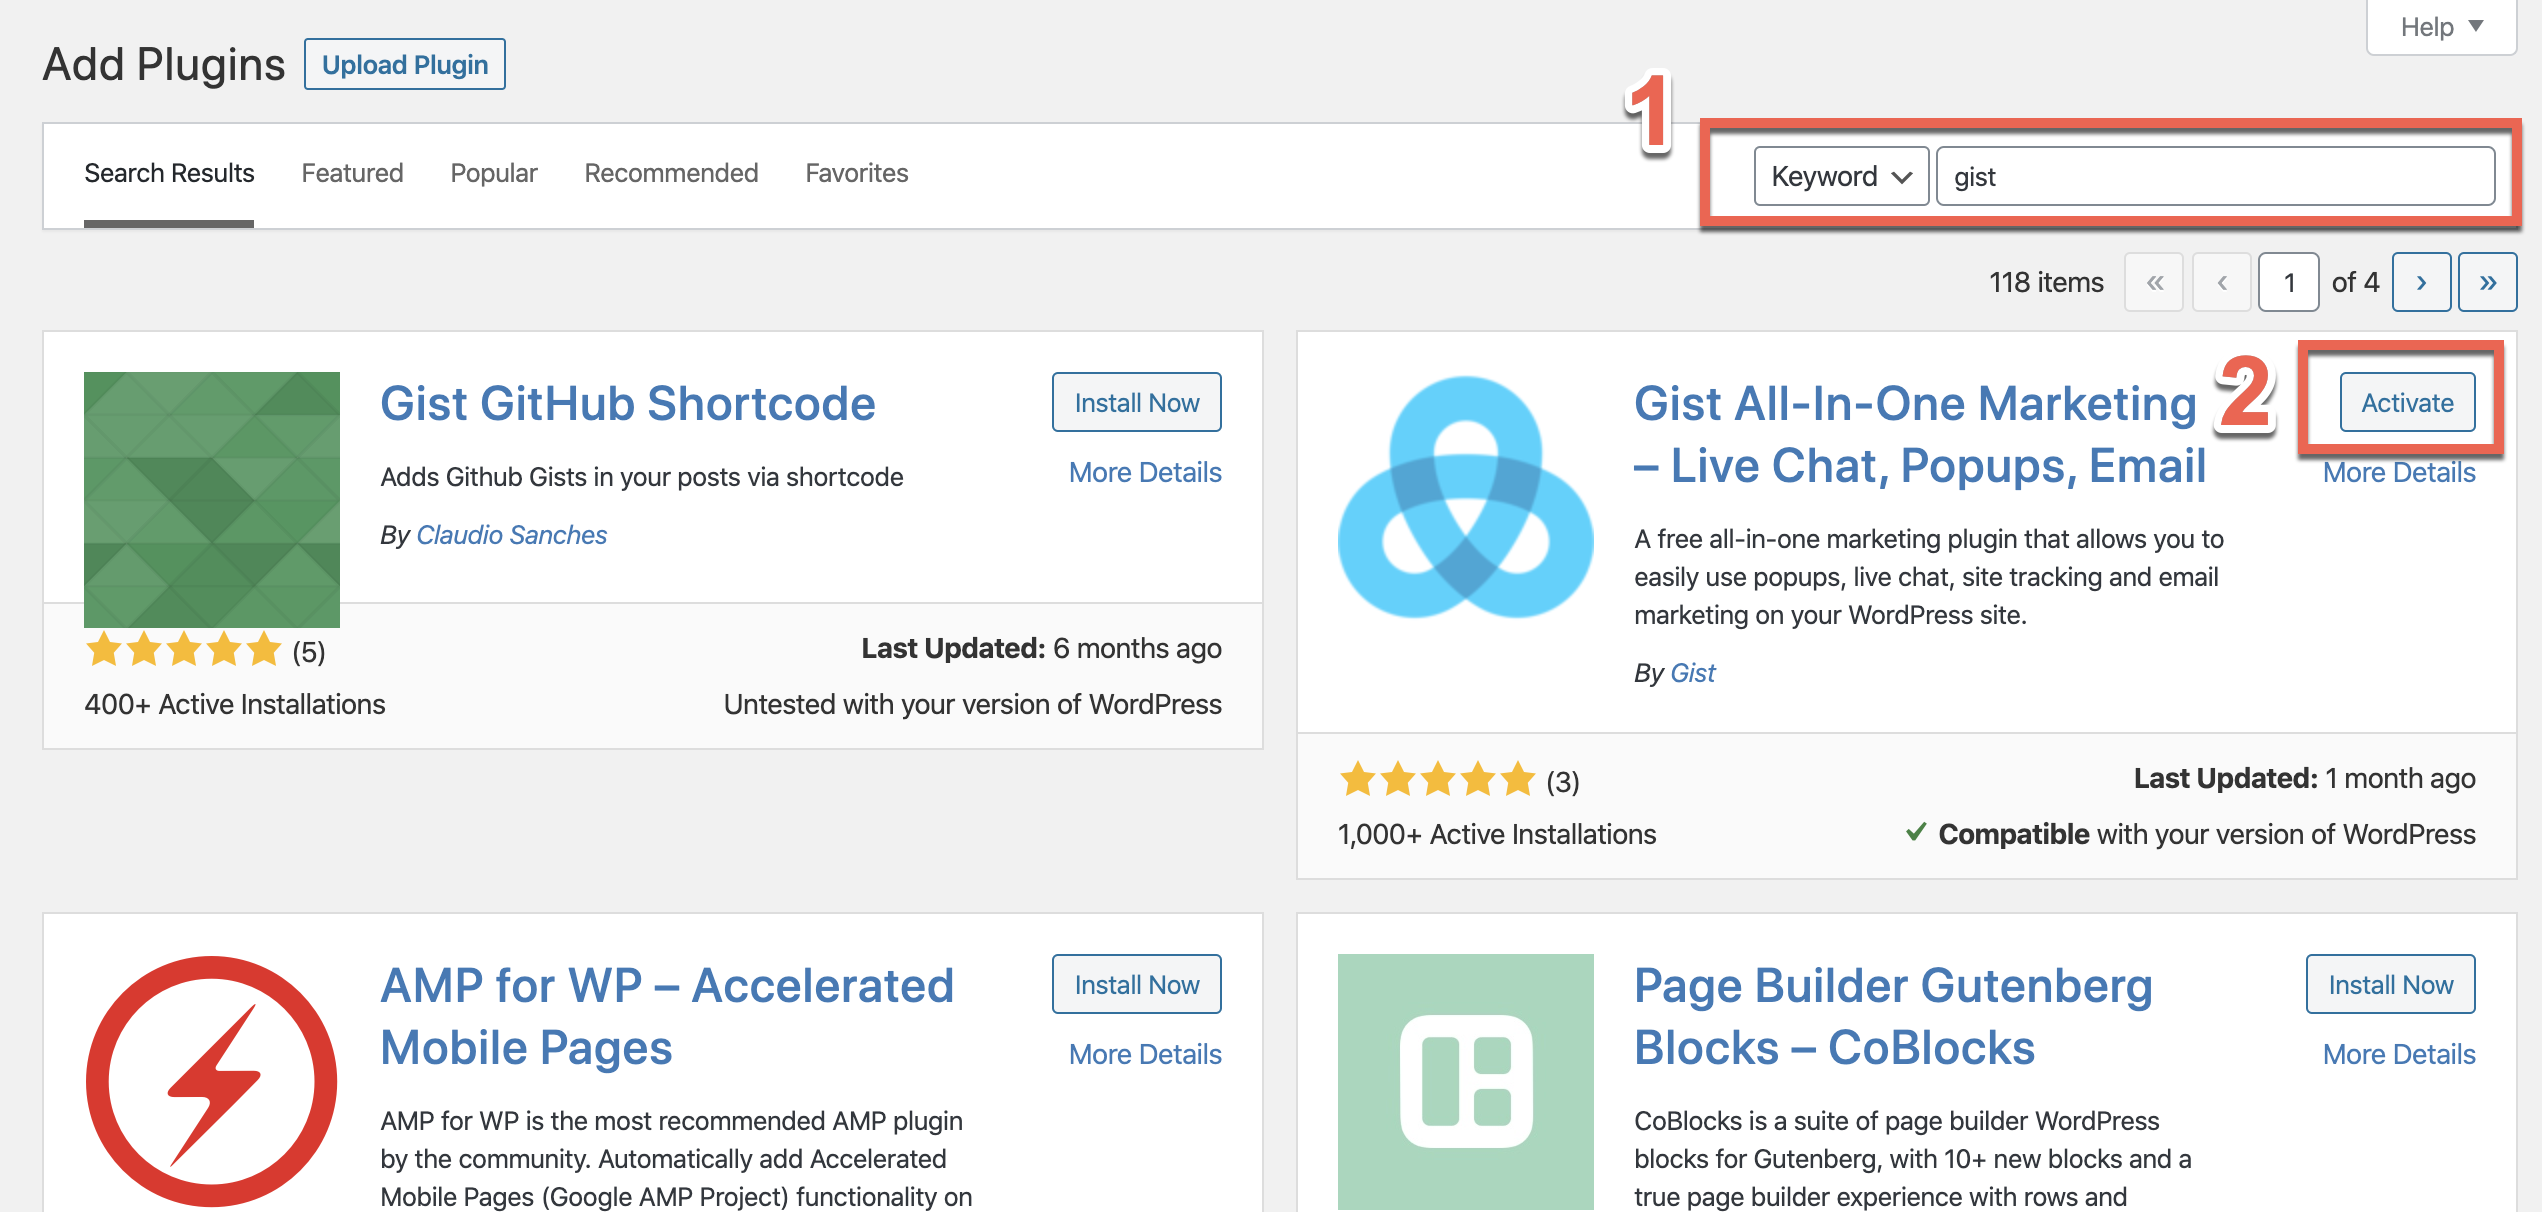
Step 1: Install the Gist WordPress Plugin
From your WordPress Admin Dashboard:
- Log in to your WordPress website admin dashboard.
- In the left sidebar menu, go to Plugins > Add New.
- In the search bar, type in "Gist Live Chat".
- Click on "Install Now" and then "Activate Plugin".
From a .zip File:
You can also download the plugin as a .zip file and upload it to your account or via SFTP.
Step 2: Obtain Your Gist Workspace ID
- Log in to your Gist account.
- From the main menu, go to Settings.
- Navigate to Tracking & events > Tracking Code.
- Copy your Workspace ID.
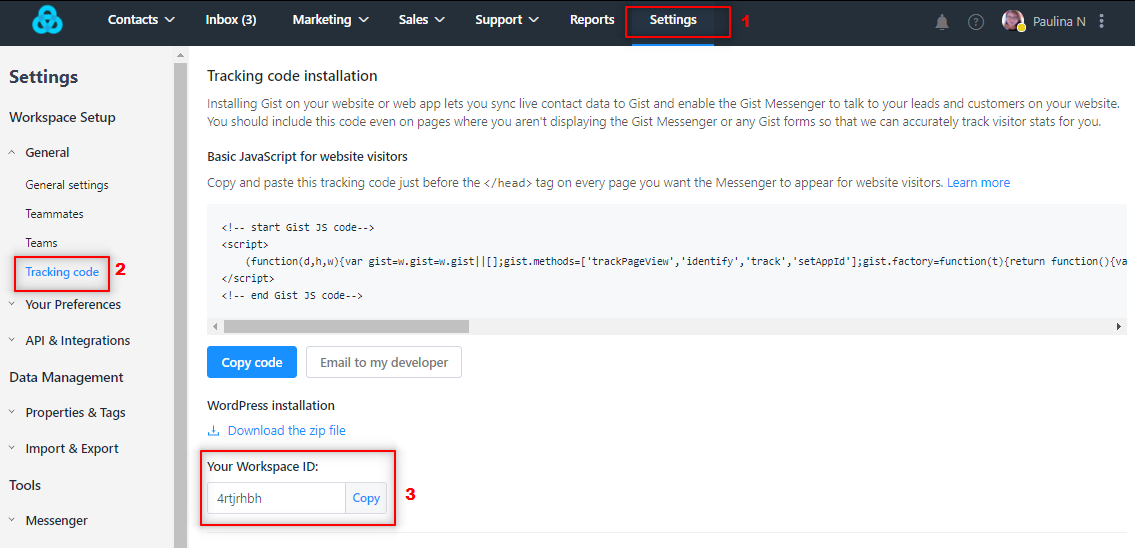
You can also capture your Workspace ID from the URL itself. If you look at the alphanumeric code after 'https://app.getgist.com/projects/', that is your Workspace ID.
Step 3: Connect Your Gist Workspace with Your WordPress Site
- Return to your WordPress admin dashboard.
- Navigate to Settings > Gist.
- Paste your Workspace ID into the appropriate field.
- Click "Save Changes".
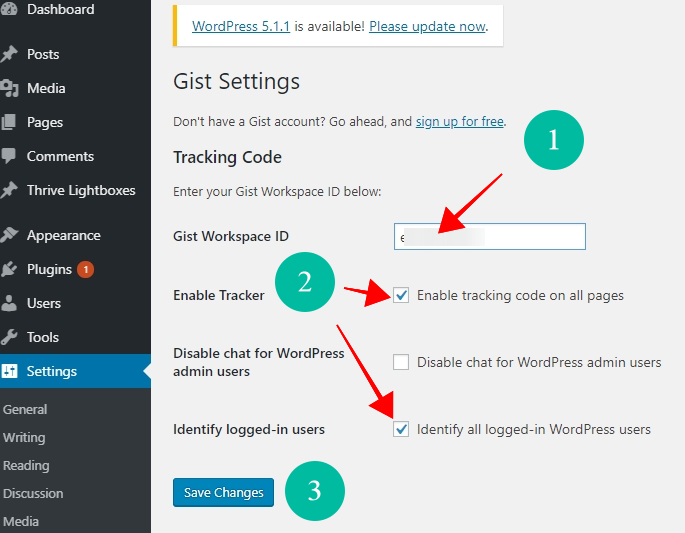
Optional Plugin Settings
The Gist WordPress plugin offers a few options to control the plugin's behavior:
- Enable Tracker: Check this box if you want to track all pages on your site.
- Disable chat for WordPress admin users: Check this box if you want to turn off chat for admin users.
- Identify logged-in users: Check this box if you want to create your registered WordPress users as Contacts within Gist.
Note: If you have the "Disable chat for WordPress admin users' box checked on your plugin settings, you'll need to log out of your WordPress site before you can see the Gist Messenger. Alternatively, accessing your site from an incognito window works too.
Verifying Your Installation
Once the plugin is installed, the Gist Messenger will appear at the bottom right corner of your website by default. If you can't see the Gist Messenger after installation, refer to our installation troubleshooting guide.
Common Questions
Q: I can't find the Gist Live Chat plugin in the WordPress Plugin directory. What can I do?
Ensure you have correctly typed "Gist Live Chat" in the search bar. If the plugin still doesn't appear, you can download the plugin as a .zip file from the WordPress website and upload it manually to your WordPress plugins.
Q: Where can I find my Workspace ID in Gist?
After you log into your Gist account, navigate to Settings. From there, go to Tracking & events > Tracking Code. Here, you'll find your Workspace ID.
Q: I’ve installed the plugin, but I don’t see the Gist Messenger on my website. What might be the problem?
If you have the "Disable chat for WordPress admin users" option checked on your plugin settings, you won't be able to see the Gist Messenger when logged in as an admin. Try logging out of your WordPress site or view your site in an incognito window. If the issue persists, please refer to our troubleshooting guide.
Q: My WordPress.com plan isn’t a Business plan. Can I still install the Gist plugin?
Unfortunately, only websites on the WordPress.com Business plan or using a WordPress.org install can support the Gist plugin. Other WordPress.com plans, like Premium and Personal, do not allow for plugins or JavaScript, so they're incompatible with Gist.
Q: How do I update the Gist WordPress Plugin?
You can update the Gist plugin just like any other WordPress plugin. Go to your WordPress dashboard and click on Updates. If there's an update available for the Gist plugin, it will show up here. Click on "Update Plugins" to install the update.
Q: I'm not sure if the wp_head function is in my WordPress theme’s header file (header.php). How can I check?
You can find the header.php file in your WordPress theme’s folder. To check if the wp_head function is present, go to Appearance > Theme Editor > Theme Header (header.php) and look for "<?php wp_head(); ?>". If it's not there, you can manually add it before the closing head tag (</head>).
You've successfully installed the Gist WordPress plugin! You're now ready to connect and engage with your site visitors and customers in real-time using the Gist Live Chat. If you have any questions or run into any issues, our support team is here to help!
Need Help?
If you have any further questions, please start a Live Chat. Just "Click" on the Chat Icon in the lower right corner to talk with our support team.