With News, you can announce product updates, company news, promotions, events, and more to your customers directly through Gist Messenger. This feature allows your announcements to stay accessible, so customers can revisit them anytime.
Key Terminology
- News: A type of content in Gist used to announce updates to your customers.
- News Item: The specific announcement or piece of content you’re sharing.
- Labels: Categories to help organize News Items, such as Product Updates, Events, Promotions, and more.
- Portal: A public webpage that consolidates all your announcements in one place.
Example News Content
The content you choose to announce is completely flexible. Some common types include:
- New Product Launches: Announce the release of a new product or feature.
- Feature and Service Updates: Keep customers informed of important updates.
- Events and Promotions: Highlight upcoming events or special offers.
- Company News: Share big changes or accomplishments within your organization.
Setting Up Your News Portal
The News Portal provides a public webpage for all your announcements. To set up:
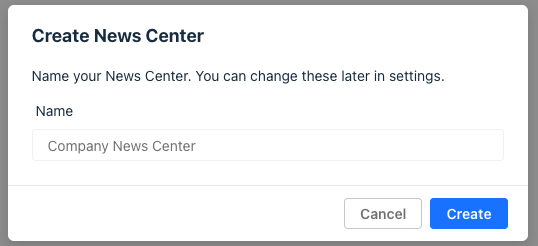
Click Create News Center, if you haven't created one yet.
Give your News Center a name.
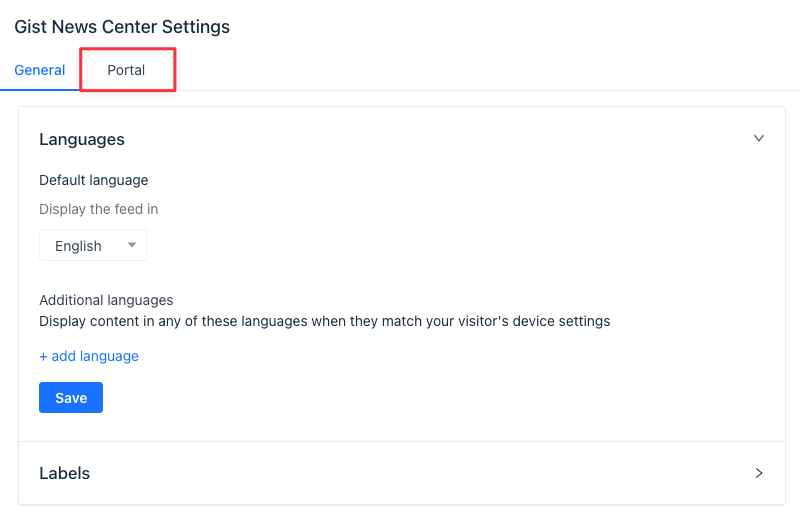
Once the News Center is created, click on it. Then switch to the Portal tab.
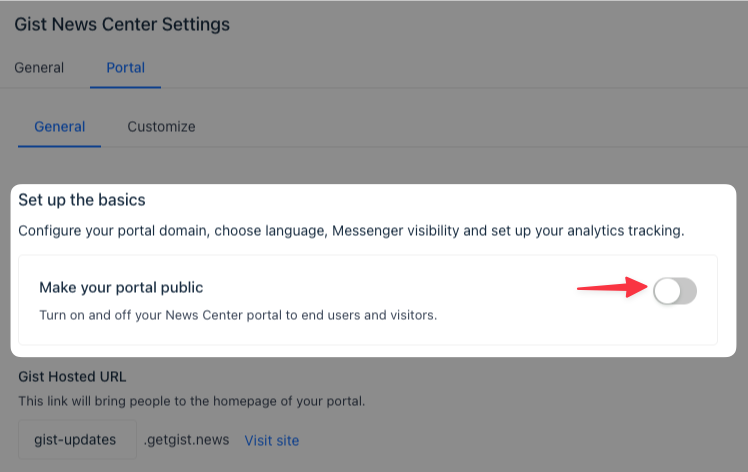
Enable Turn on Portal to activate your News Portal.
Setting Up a Custom Domain
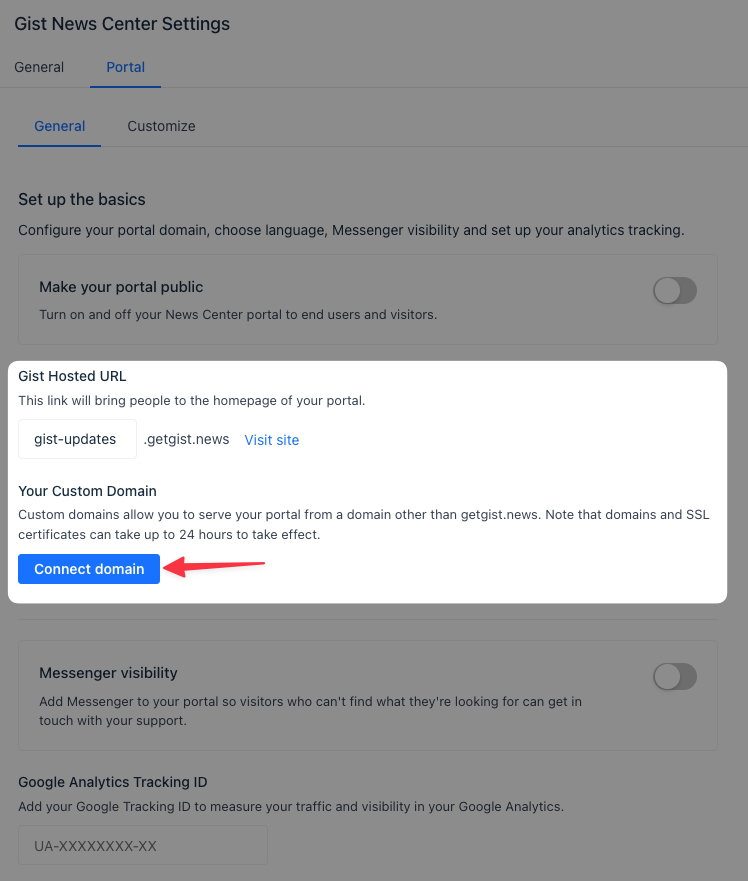
By default, your portal URL will be yourcompany.getgist.news. However, if you’d prefer, you can configure a custom domain for a more branded experience.
1. In your News Portal settings, click Connect domain.
2. Enter your desired custom domain, like updates.yourcompany.com.
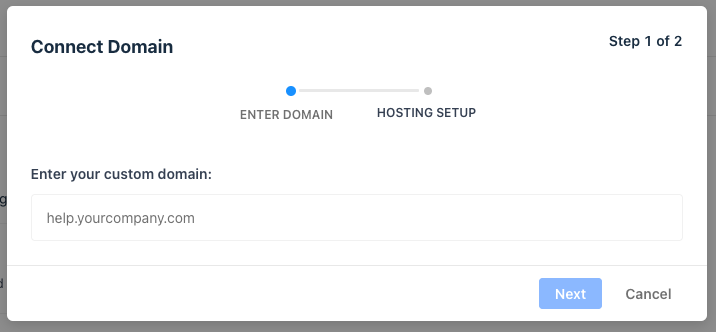
3. Log in to your DNS provider or Domain registrar account and create a CNAME record that points your chosen subdomain to yourcompany.getgist.news.
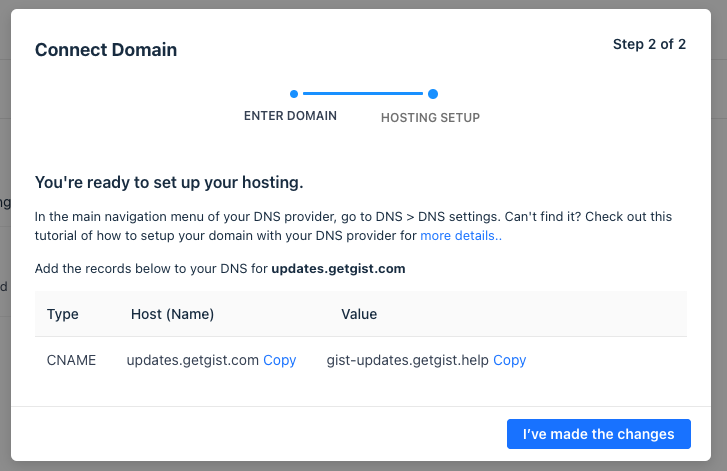
4. Once done, wait for a few minutes for the DNS changes to propagate and then click I've made the changes.
5. That's it. If everything is set correctly, we'll generate an SSL certificate within an hour and you should be able to access your new Portal.
Note: DNS changes can sometimes take up to 72 hours to take effect. Also, if you're using Cloudflare to manage your DNS records, ensure the orange clouded icon is disabled. Otherwise, the DNS entries will not redirect properly, and SSL generation for your custom domain will fail.
Customizing Your News Portal
You can personalize the News Portal to match your branding and make it more engaging:
- Analytics Tracking: Define URLs and add tracking for visitor data.
- Branding Options: Upload your logo, add a header image, select colors, and include links to your social channels.
- Search Engine Visibility: By default, published News Items will appear in search engines. If preferred, you can disable this in the portal settings.
Note: You only need to enable the Portal if you want your News displayed on a public-facing page. News can still show within the Messenger without Portal activation.
Creating a News Item
To make your first announcement:
From the main menu, go to Outbound.
Click on News Items in the sidebar.
Click + New news item in the top right to start creating your announcement.
Adding Content to your News Item
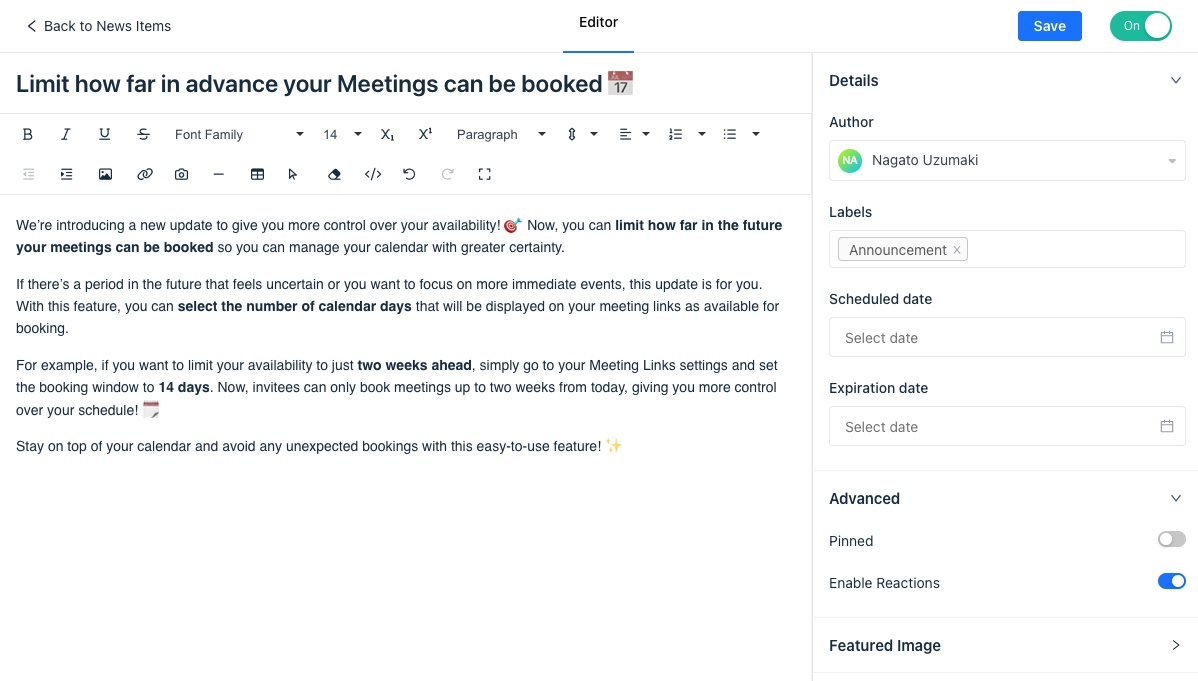
Here’s a quick guide to creating a compelling News Item:
Feature Image: Upload an image sized 900x504px (JPEG, JPG, or PNG). This will display prominently in the Newsfeed.
Title & Content: Give your announcement a clear title, then add content using the News editor. You can incorporate text, images, tables, buttons, dividers, videos, files, HTML code, emojis, bullet points, and more to make the content engaging.
Author: Select which teammate the announcement will be from, adding a personal touch.
Labels: Organize your News Item with relevant labels for easier browsing.
Reactions: Enable this setting to let customers react to your news. This is a great way to gauge engagement and collect feedback.
Publishing and Scheduling Your News Item
Once your News Item is complete, set the Scheduled date to control when it appears in Messenger. This allows you to time announcements effectively for maximum impact.
Once finalized, set it live, and your announcement is ready for customers to engage with.


