

Popup forms are crucial for capturing essential customer information and promoting significant content in the digital space. Gist makes it seamless to craft these popups to your exact preferences. Below is a comprehensive guide that breaks down each section of the Gist form builder, outlining the functionalities and steps to navigate and utilize this tool efficiently.
Builder
Gist provides a user-friendly, drag-and-drop popup builder. It is designed to let you create aesthetically appealing popups with pre-built, proven-to-convert templates. You can quickly modify, reorganize, delete, or add fresh content to customize your popups to your satisfaction. Real-time updates on the canvas allow for instant visualization of adjustments.
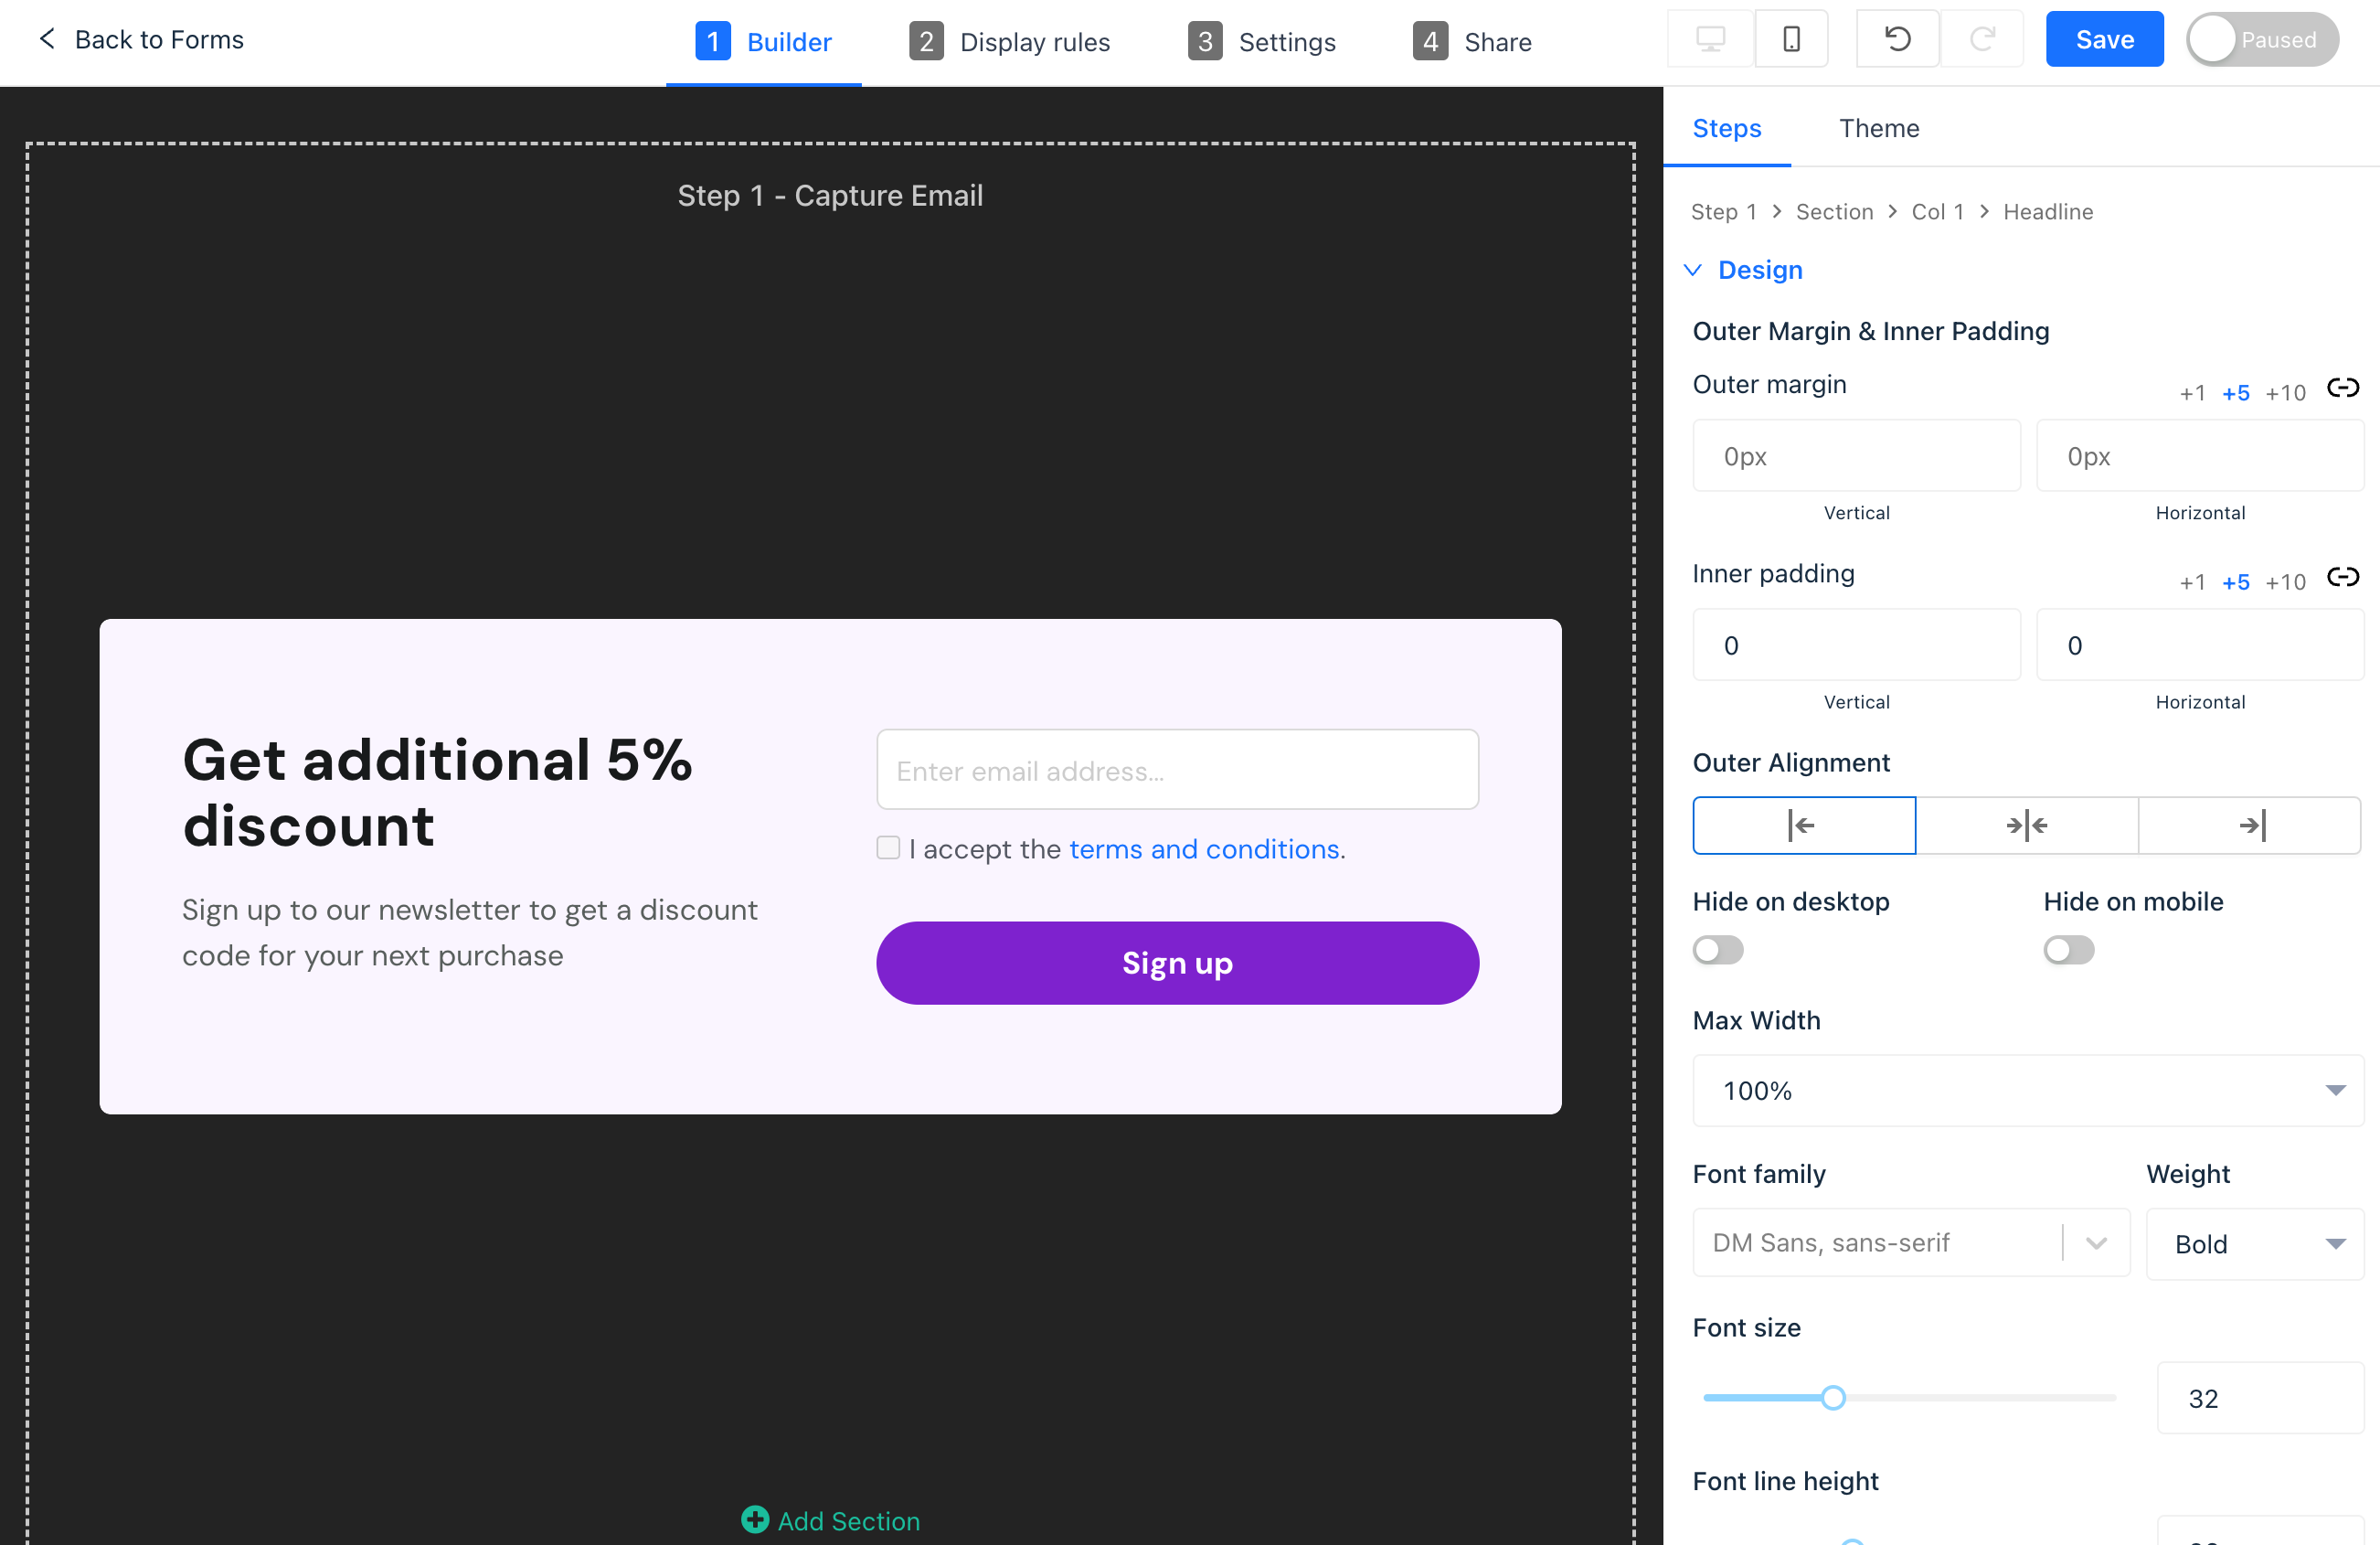
Each element is editable by a simple point-and-click, providing a sidebar menu for making additional changes. Learn more about the builder →
Display Rules
Tailor when and where your form appears to site visitors using “Display Rules”. These are specific logic statements you set up within Gist to pinpoint visitor segments.
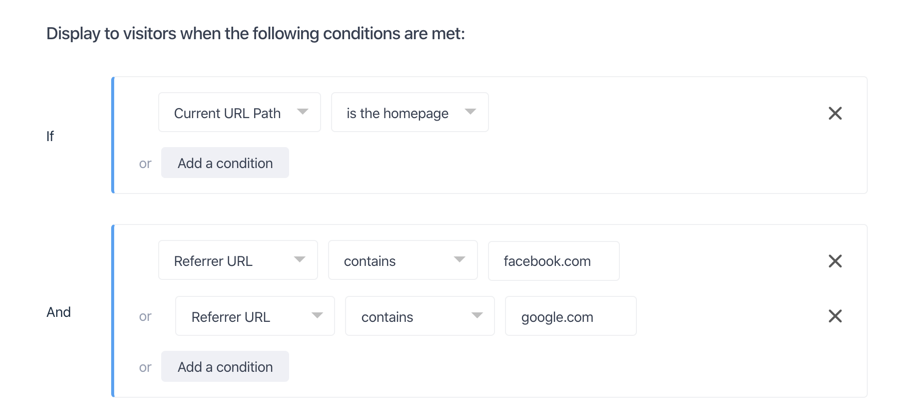
To add a new rule:
- Click “+ Add a Condition”.
- Choose a condition type.
- Input any extra values required for that condition type.
For additional information on different targeting display rule types, refer to the display rules reference guide →
Settings
Leverage various options to ensure your subscribers receive a seamless and engaging experience.
Opt-in Settings
In this section, you can:
- Automatically subscribe all individuals who submit the form, or
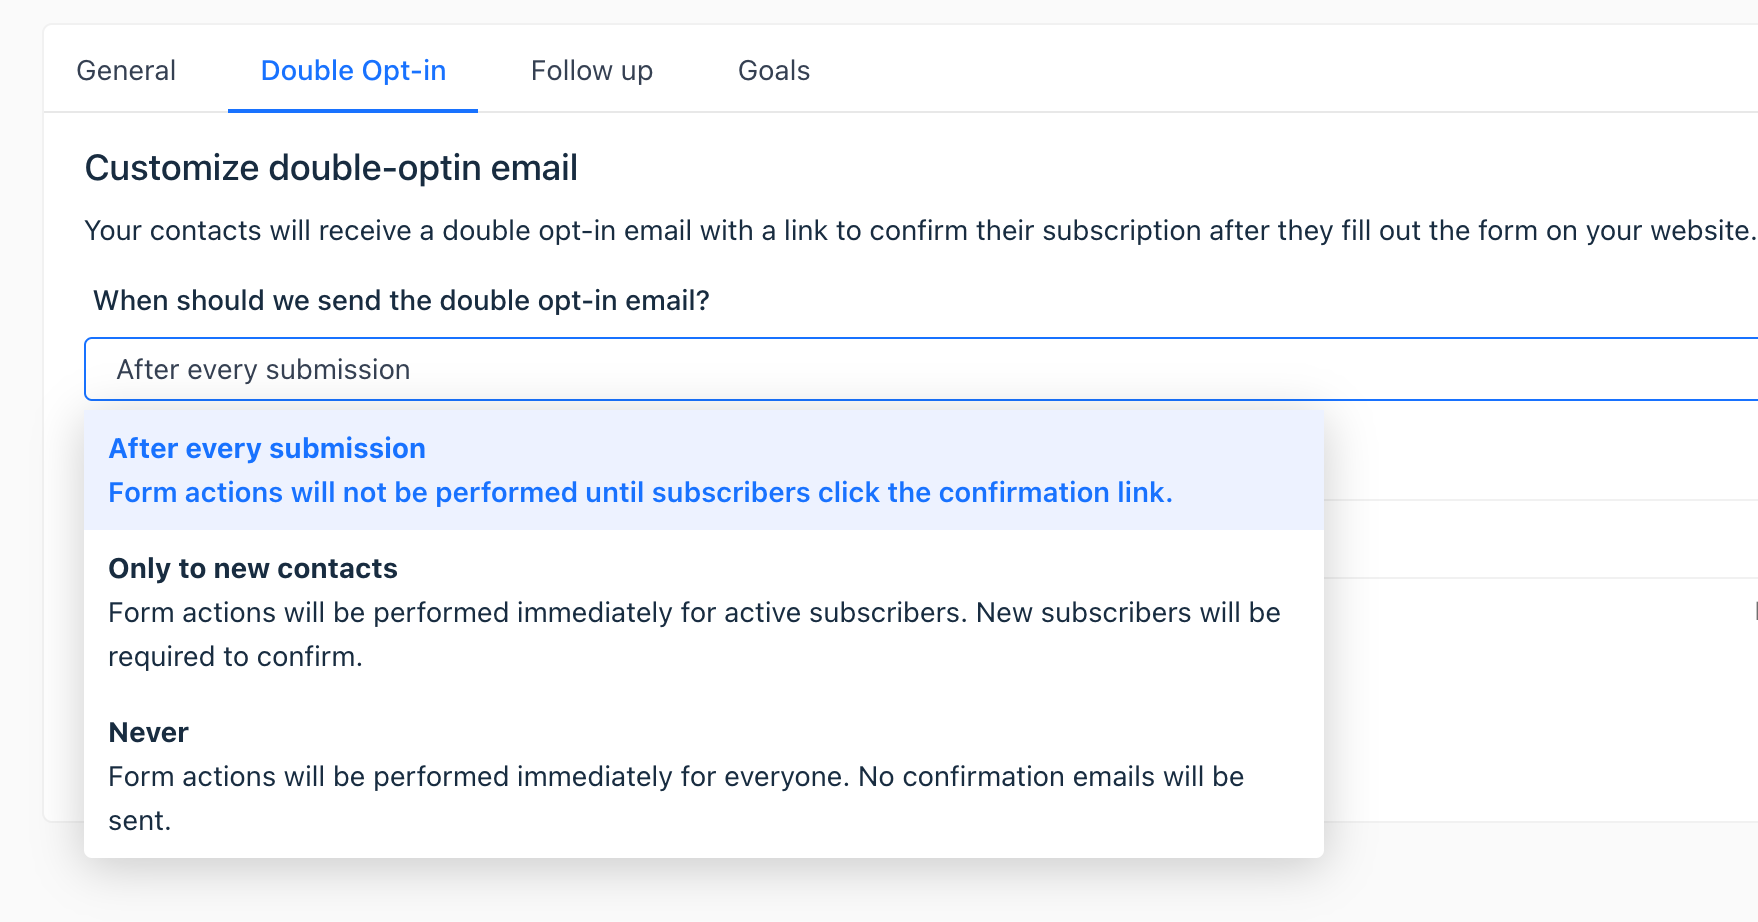
- Send a double-opt-in email to verify subscribers' email addresses. This feature adds authenticity, ensuring subscribers are genuinely interested and have provided correct contact details.
Learn more about Double-Opt ins →
Manage Subscription Types
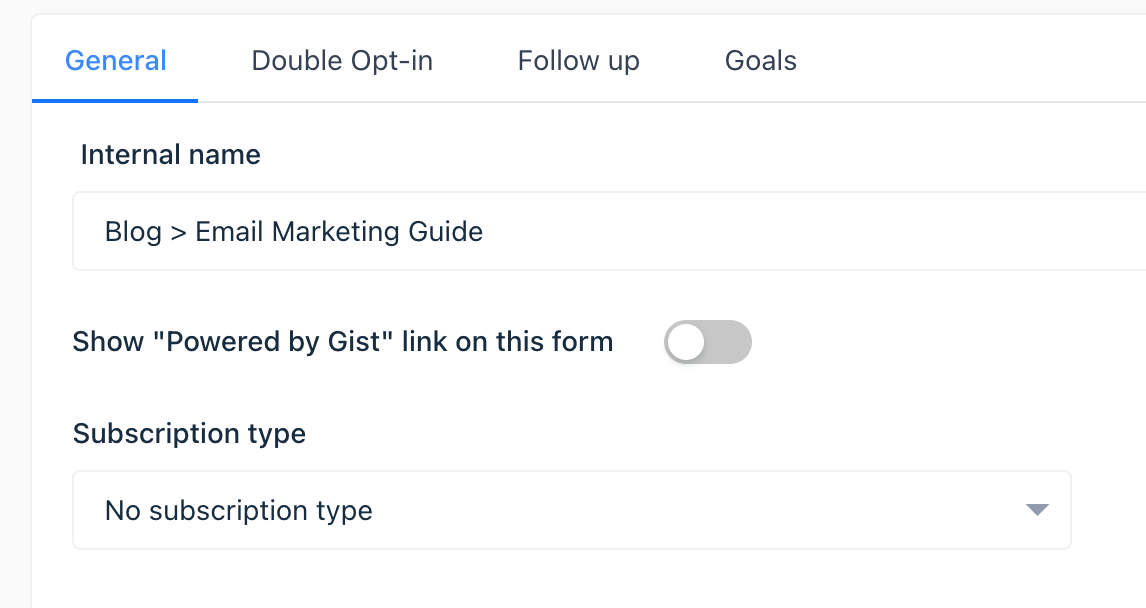
You can assign specific subscription types to form submissions. Subscription types categorize the topics that your email list covers. Examples include product updates, billing information, announcements, newsletters, etc. This helps organize the email list and ensure subscribers receive relevant and desired information. Learn more about Subscription Types →
Send Follow-Up Emails
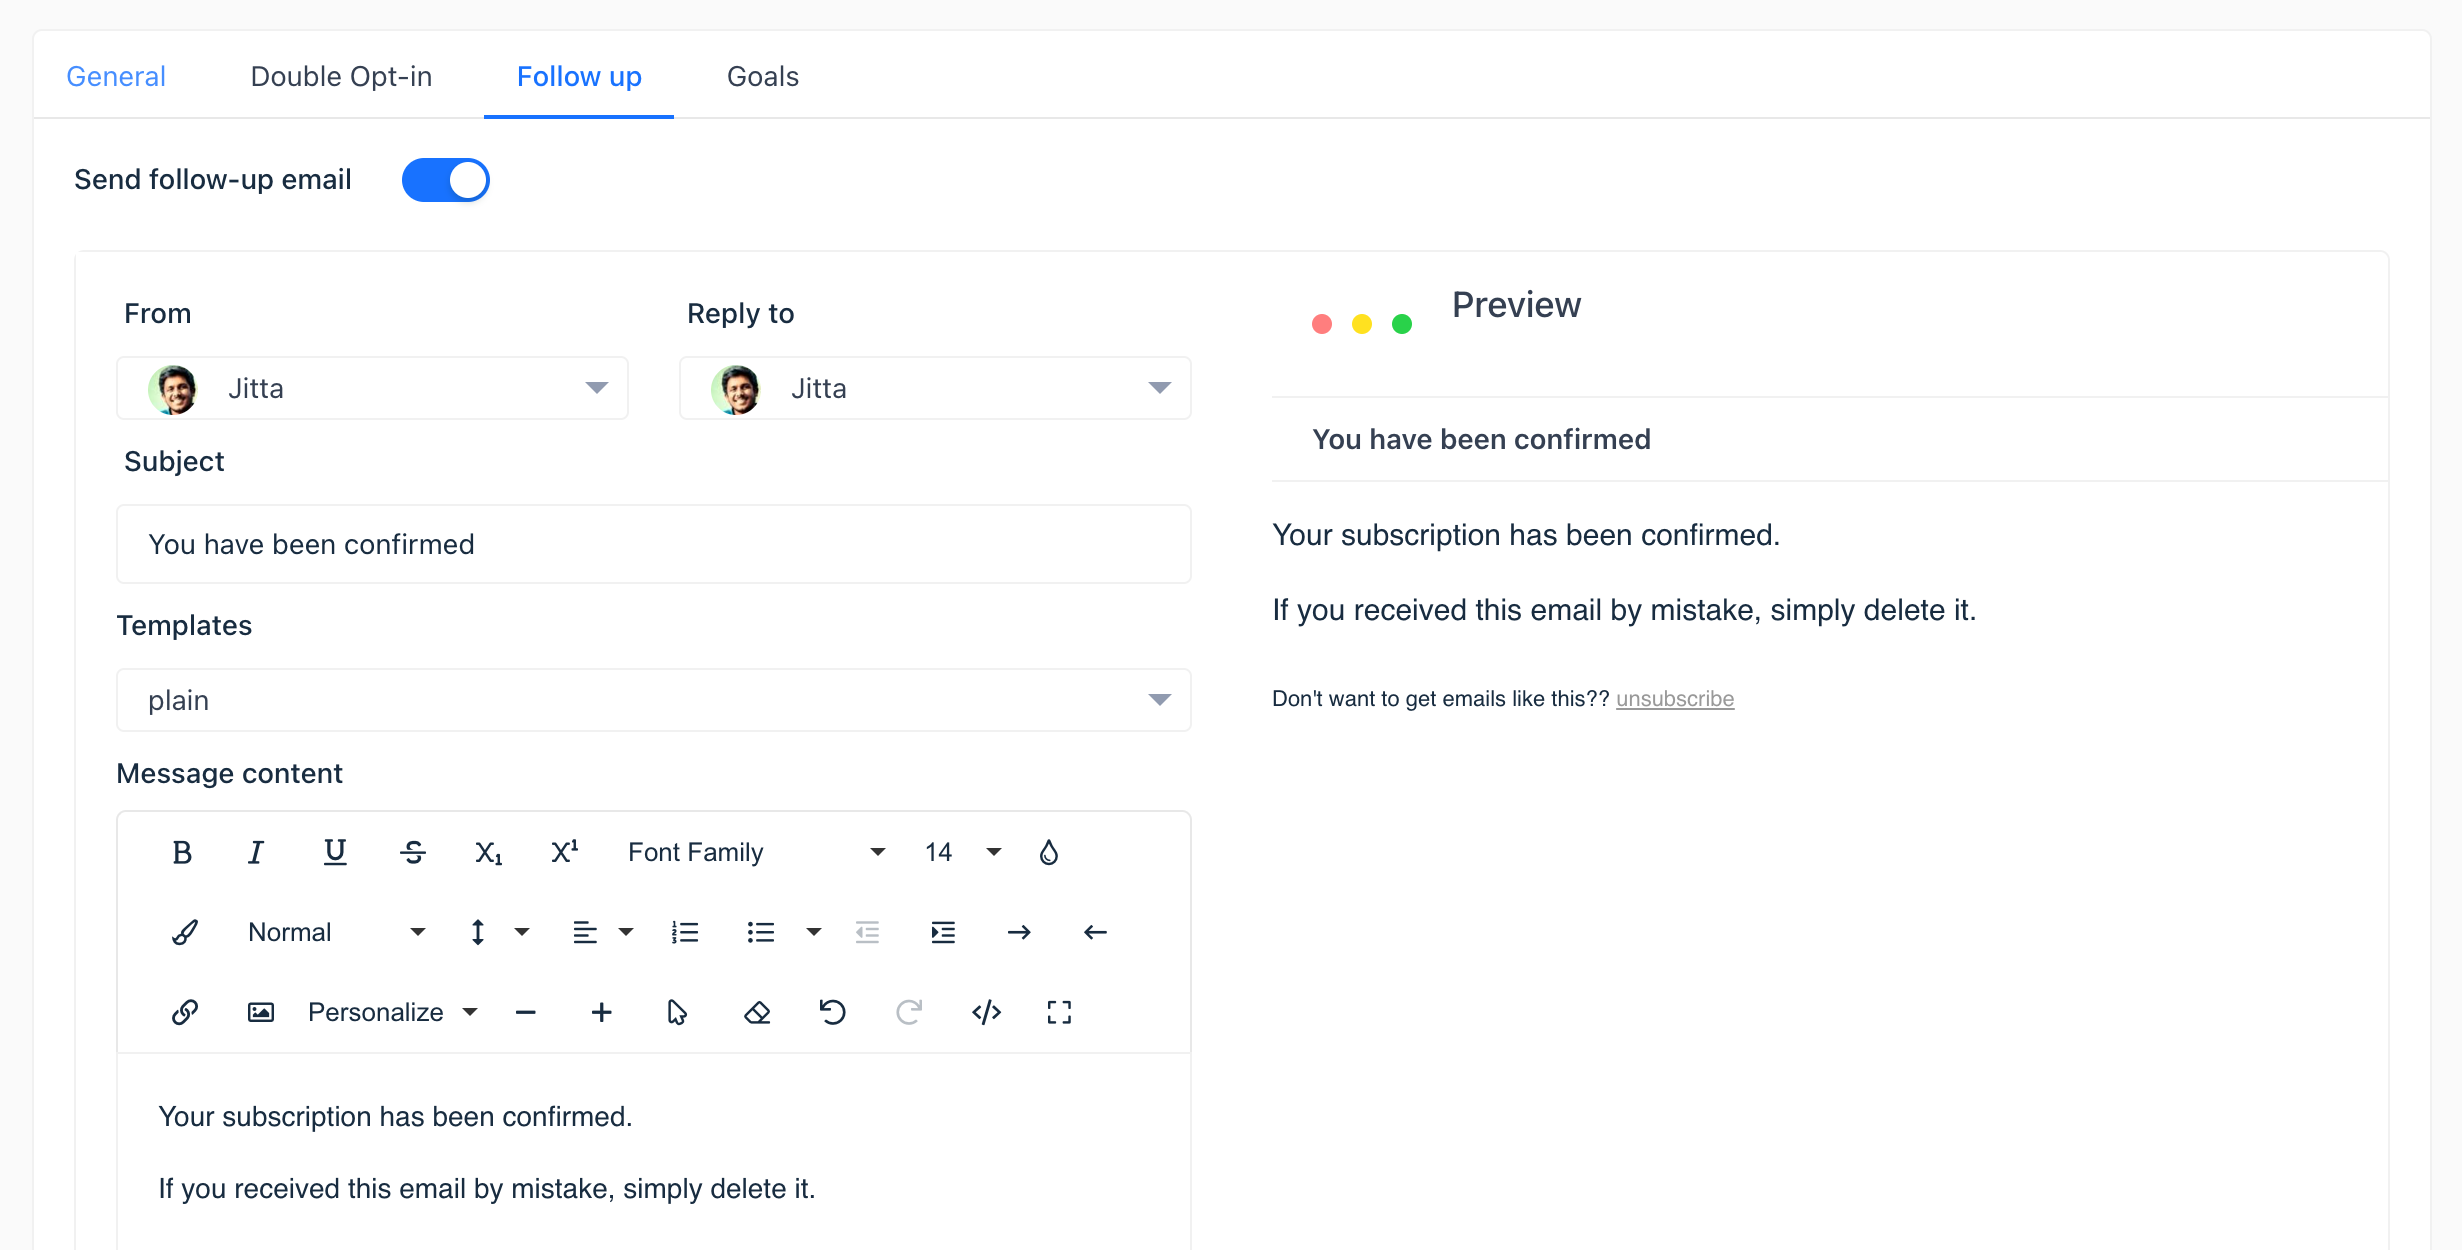
Send lead magnets, welcome emails, or other relevant information to new subscribers promptly after form submission.
Manage Goals
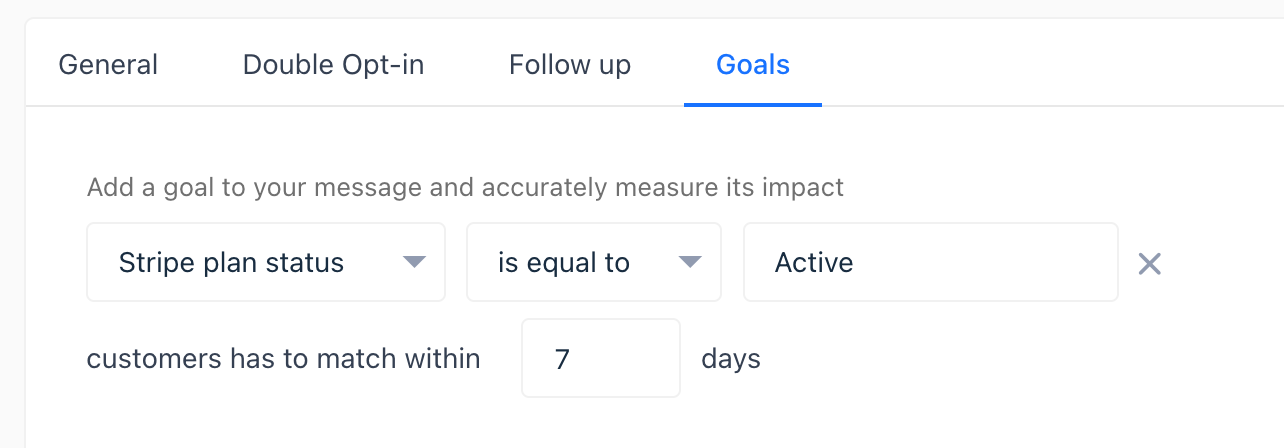
This is primarily utilized for analytics purposes. It helps keep track of the actions performed by contacts after submitting the form. This information is valuable for understanding subscriber behavior and interactions, providing insights that can be used to enhance future communication strategies.
Share
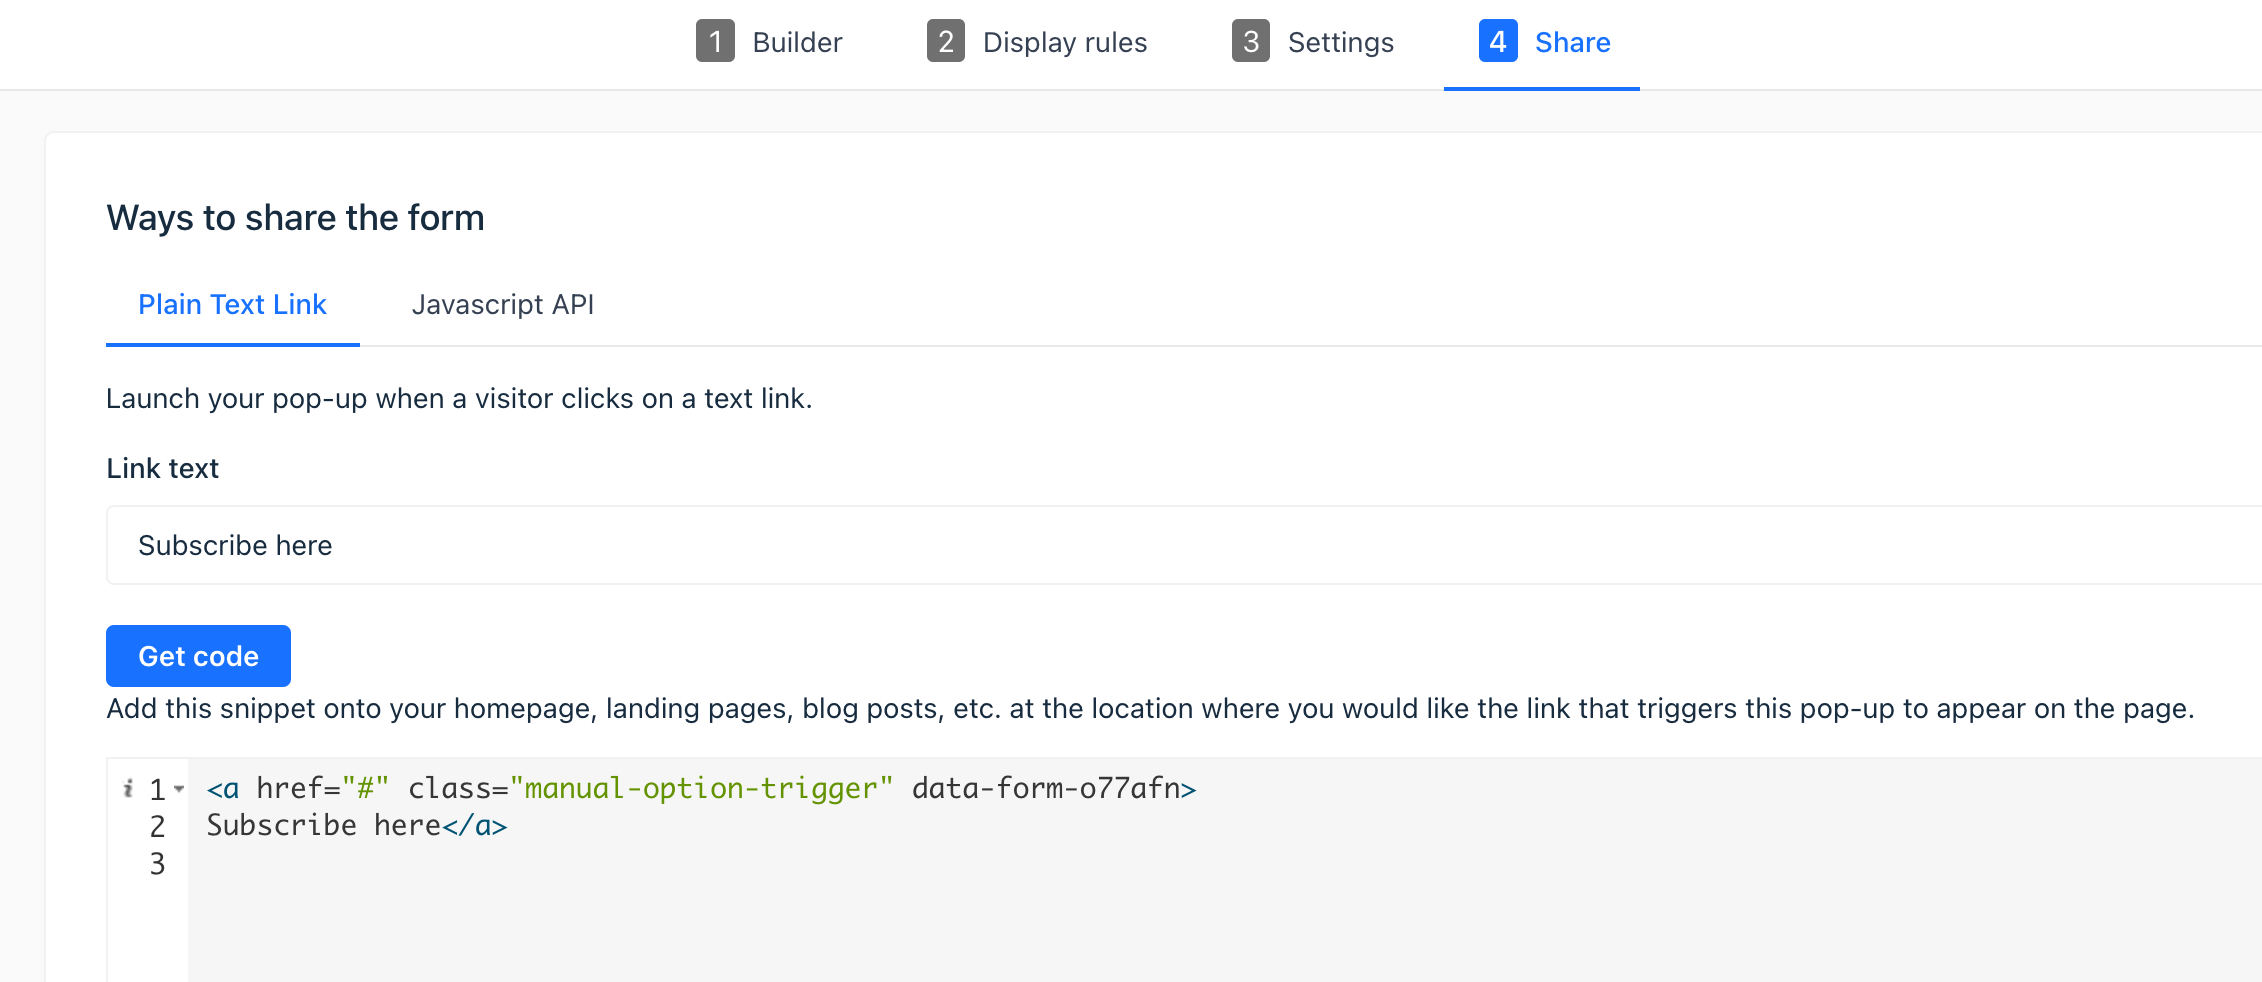
The Share tab aids in getting your form live and functional on your website. Live popup forms will automatically start showing to your visitors based on your preset display rules. To manually integrate popups into your site as a link or button, utilize the “Plain Text Link” feature within the Share tab.
Steps to add Plain Text Link:
- Open your pop-up's share tab and select the “Plain Text Link” tab.
- Enter the desired text for your link.
- Click “Get Code” and copy the entire snippet.
- Paste the snippet on your webpage where you want the link to appear.
Troubleshooting
Should your popup not appear as expected, follow these troubleshooting steps:
- Open your page’s source code.
- Ensure your entire pop-up publishing snippet is within your page’s code.
- Confirm JavaScript code support on your site’s platform.
- Try viewing your pop-up in another browser or device.
- Clear your cache if pop-up appearance issues persist across browsers.
In conclusion, Gist's form builder is a comprehensive tool designed for ease and effectiveness in creating, customizing, and implementing popup forms on your website. Navigate the builder settings, share options with ease, and troubleshoot effectively to ensure optimal performance of your popups.