

A well-branded and functional footer is a key element of any Knowledge Base. It enhances the visual appeal and provides users with quick access to important links and social media platforms. This guide outlines the steps to customize the footer of your Knowledge Base, ensuring it aligns with your brand and meets the needs of your audience.
Manage footer links
1. Begin by navigating to Settings > Knowledge Base > General page.
2. Switch to the 'Customize' tab. This is where you will find all the options to modify your footer.
3. To add new links to your footer, click the 'Footer' section and the "Add another link" option.

4. Give your link a call-to-action text and enter the URL in the next text box. That's it!
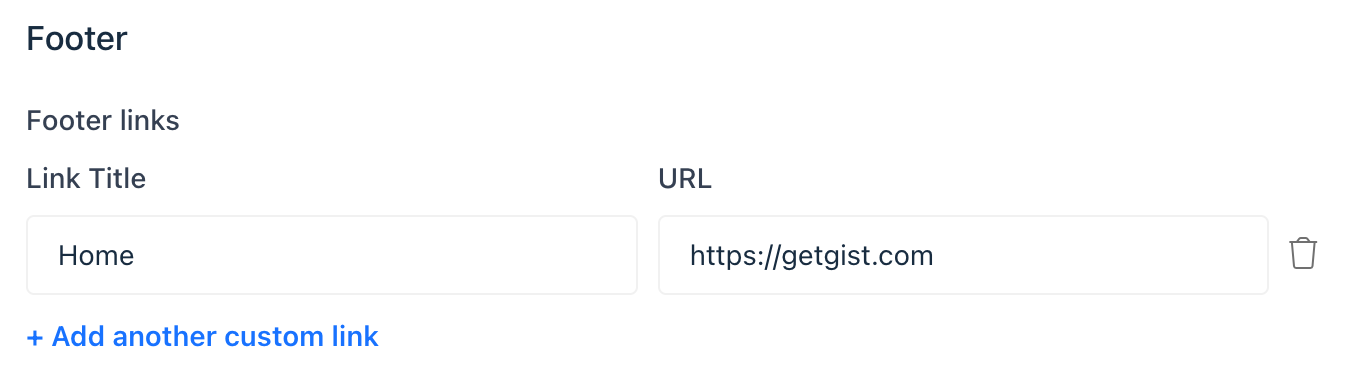
You can add multiple links, giving users direct access to important pages or resources.
If you need to remove a link, click on the bin icon next to the link in question. This will delete the link from your footer.
Add social media icons
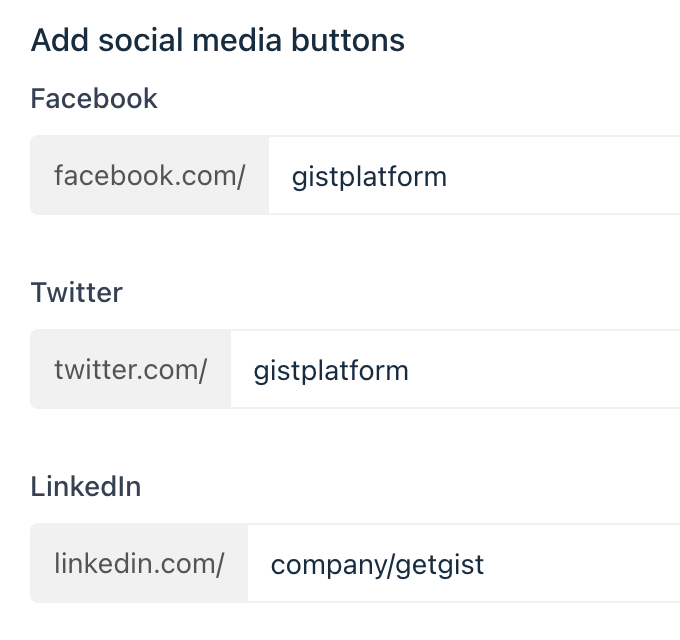
You can add your social media handles of Facebook, Twitter, and LinkedIn within the same 'Footer' section. There is a dedicated space to input your handles for the supported platforms, making it easy for users to connect with your brand on social media.
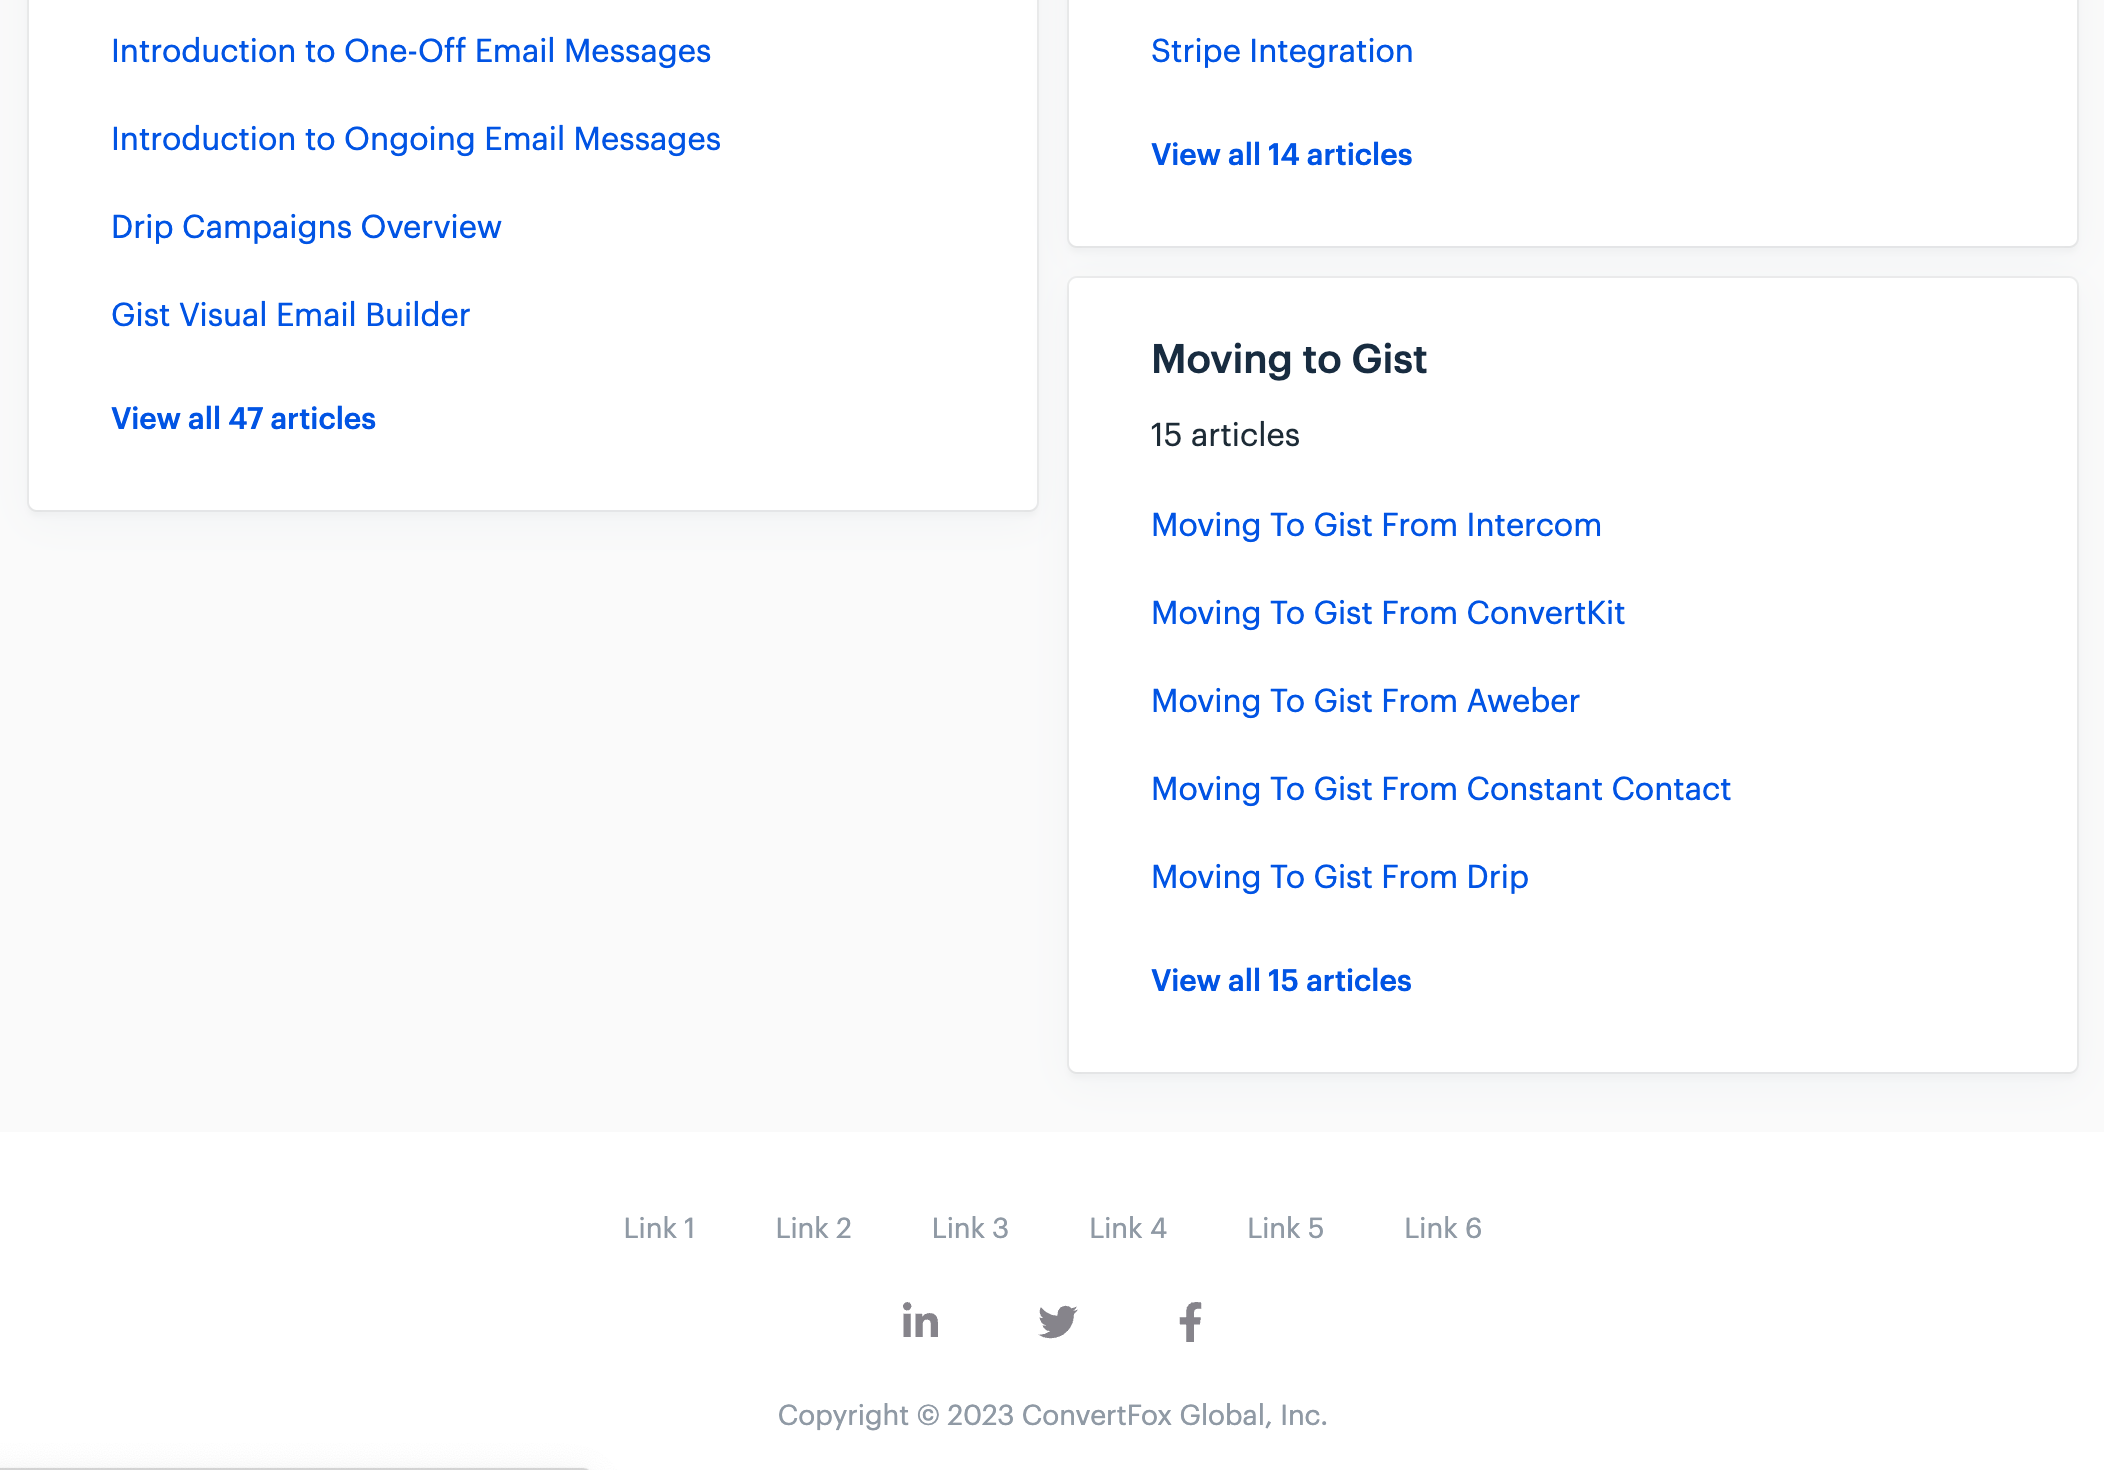
Once customized, your footer will be consistently displayed across all pages of your Help Center, including the homepage, collections, and individual articles. This ensures a uniform look and feel throughout your Knowledge Base.
Need Help?
If you have any further questions, please start a Live Chat. Just "Click" on the Chat Icon in the lower right corner to talk with our support team.