

Using Automation Rules from Gist, you can now use simple “if this, then that” style rules to perform tasks. You can automate the most important but, at the same time, boring aspects of marketing with Gist.
You can move subscribers in and out of campaigns. You can apply tags to users based on their actions, delete users from the database, and much more.
Setup your rules
Choose a Trigger and then Select an Action. Watch the videos below and set up your own Automation right now!
Step 1: Choose a Trigger.
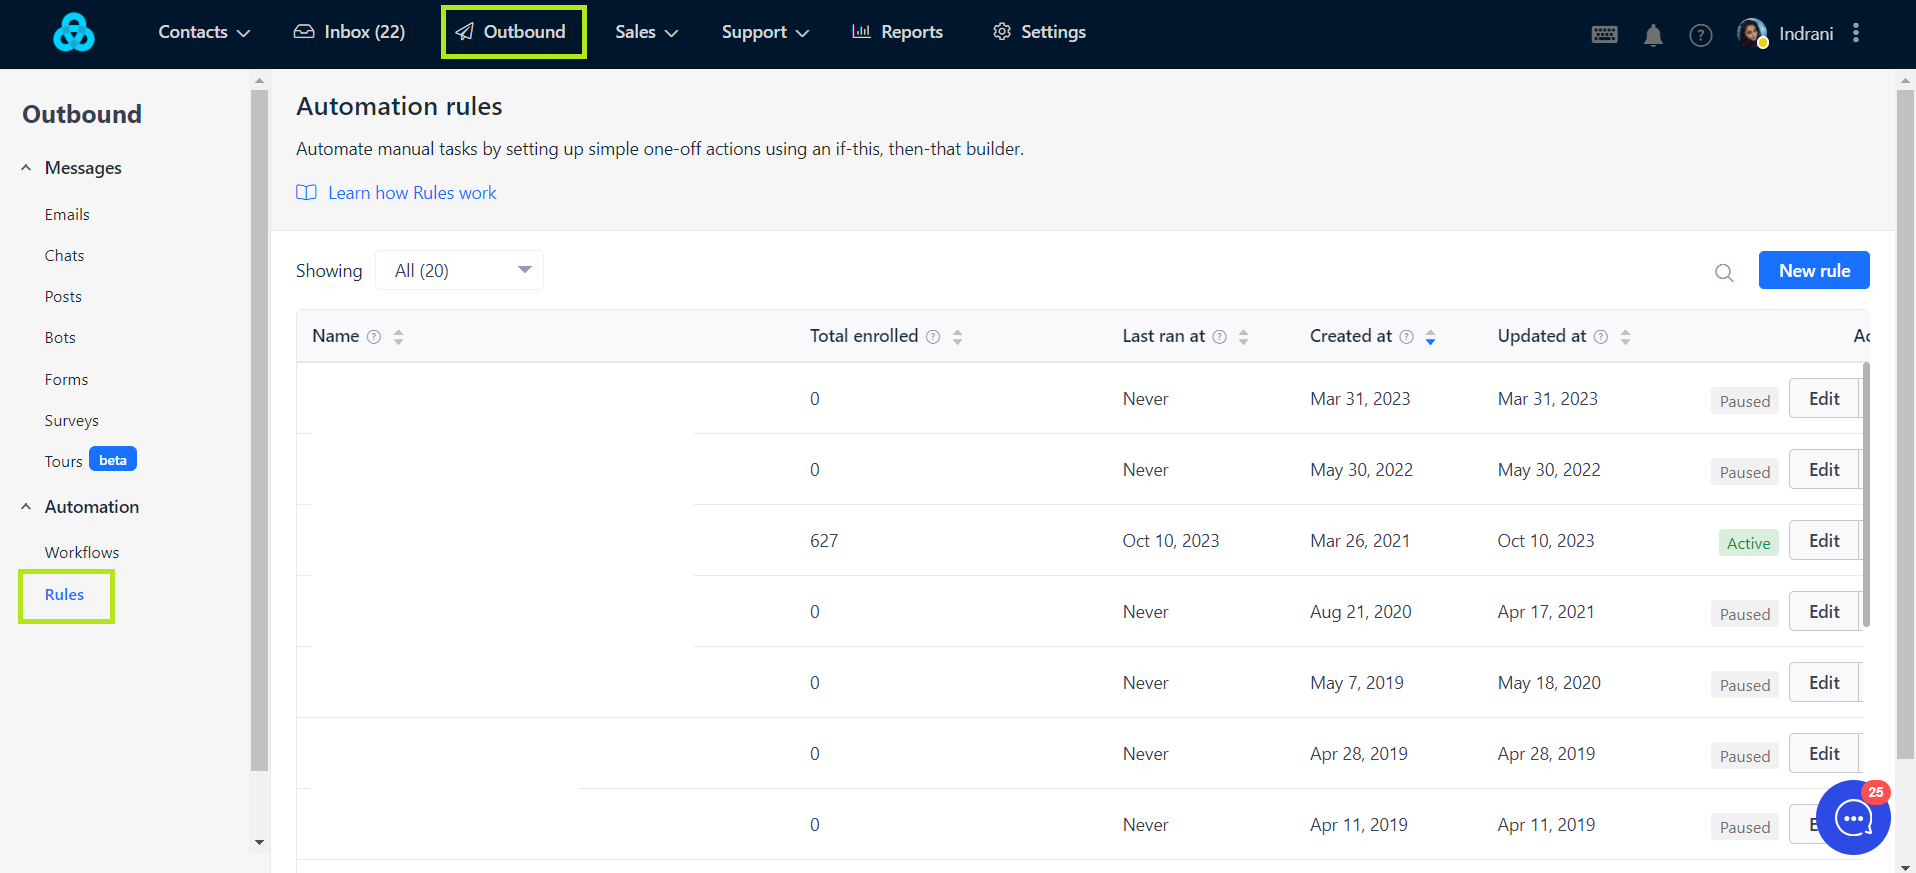
To use marketing automation on Gist, you need to set up event triggers and their respective actions.
To do this, select the ‘Outbound’ tab on the taskbar and click on Automation > Rules .
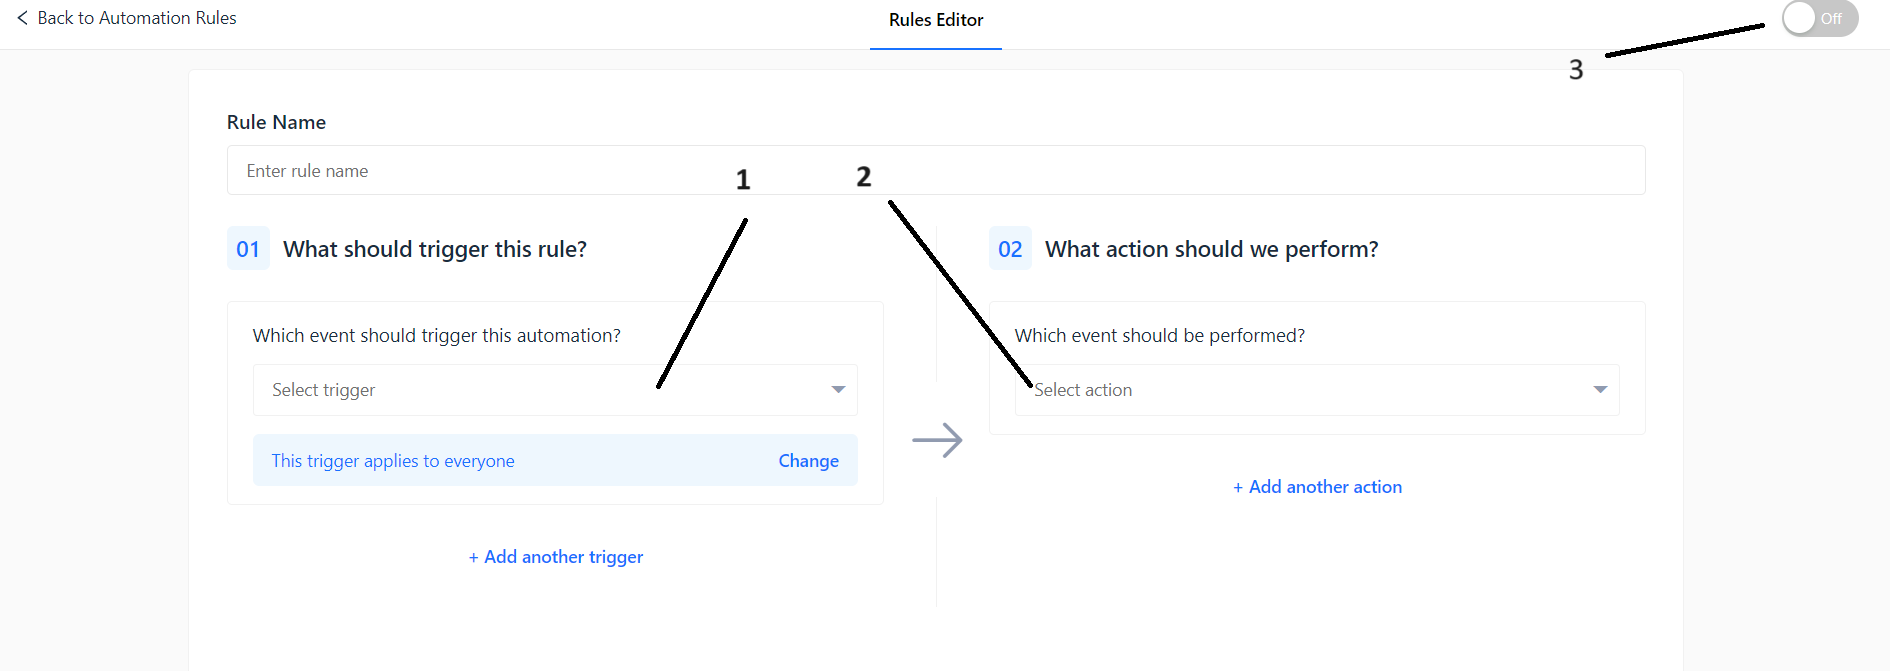
Choose an appropriate name for your trigger depending on what action you’re automating.
Step 2: Select Action.
Select the event which you want to focus on, and choose the action you want to trigger as a consequence of that event.
For instance, when someone ‘submits a form’, you can configure Gist to send them an email campaign automatically.
Once you finish defining your trigger, switch the On/Off toggle in the upper right to turn your Automation on. Your new automation trigger is live, and Gist will take care of the actions automatically.
Gist has over 40 triggers and actions, which you can use to build as many automation rules as you want, including creating multiple actions for the same trigger.
Here are the various triggers that are available to you on Gist:
- Matches a Custom Audience
- Entered a Campaign
- Completed a Campaign
- Exited from a Campaign
- Applied a Tag
- Removed a Tag
- Subscribed to a Subscription Type
- Unsubscribed from a Subscription Type
- Unsubscribed from all Marketing emails
- Submitted a Form
- Clicked a link from email
- Visited a Page
- Opens / Reads an email
- Updated a Contact Property
- Submitted Email in Chat
- Performed an Event
- Made a Purchase
- Abandon a Cart
- Trigger on a Particular Day
And here are all the actions that Gist can take based on the trigger conditions set.
- Apply a tag
- Remove a tag
- Send a Campaign
- Move from one campaign to another
- Restart a campaign
- Stop a campaign
- Send a broadcast email
- Set a contact property value
- Delete the contact
- Unsubscribe from all marketing emails
- Subscribe to subscription type
- Unsubscribe from subscription type
- Notify a teammate
- Trigger a webhook
- Add to Facebook Custom Audience
- Remove from Facebook Custom Audience
- Enroll into a workflow - Add the contact to a workflow
- Remove from a workflow - Remove the contact from a workflow
- Perform math - Perform math operations on the contact property for the contact
- Add Owner
- Remove Owner
Need Help?
If you have any further questions, please start a Live Chat. Just "Click" on the Chat Icon in the lower right corner to talk with our support team.