

The Gist Knowledge Base allows you to provide your customers with immediate and targeted support by suggesting articles that answer common questions and empower customers to quickly help themselves before they chat. This guide will walk you through the process of setting up your Knowledge Base in four simple steps.
1. Writing and Adding Your First Articles
Setting up a Knowledge Base starts with creating and organizing the articles that will populate it. If you’re not sure what to write about, check out our guide to writing help articles.
Collections help you to keep your help content organized and user-friendly. Articles need to be added to a collection to appear in your Knowledge Base.
Alternatively, if you already host your help content on another service, you can pull in your articles and collections with a single click using our import tool.
2. Customizing Your Knowledge Base
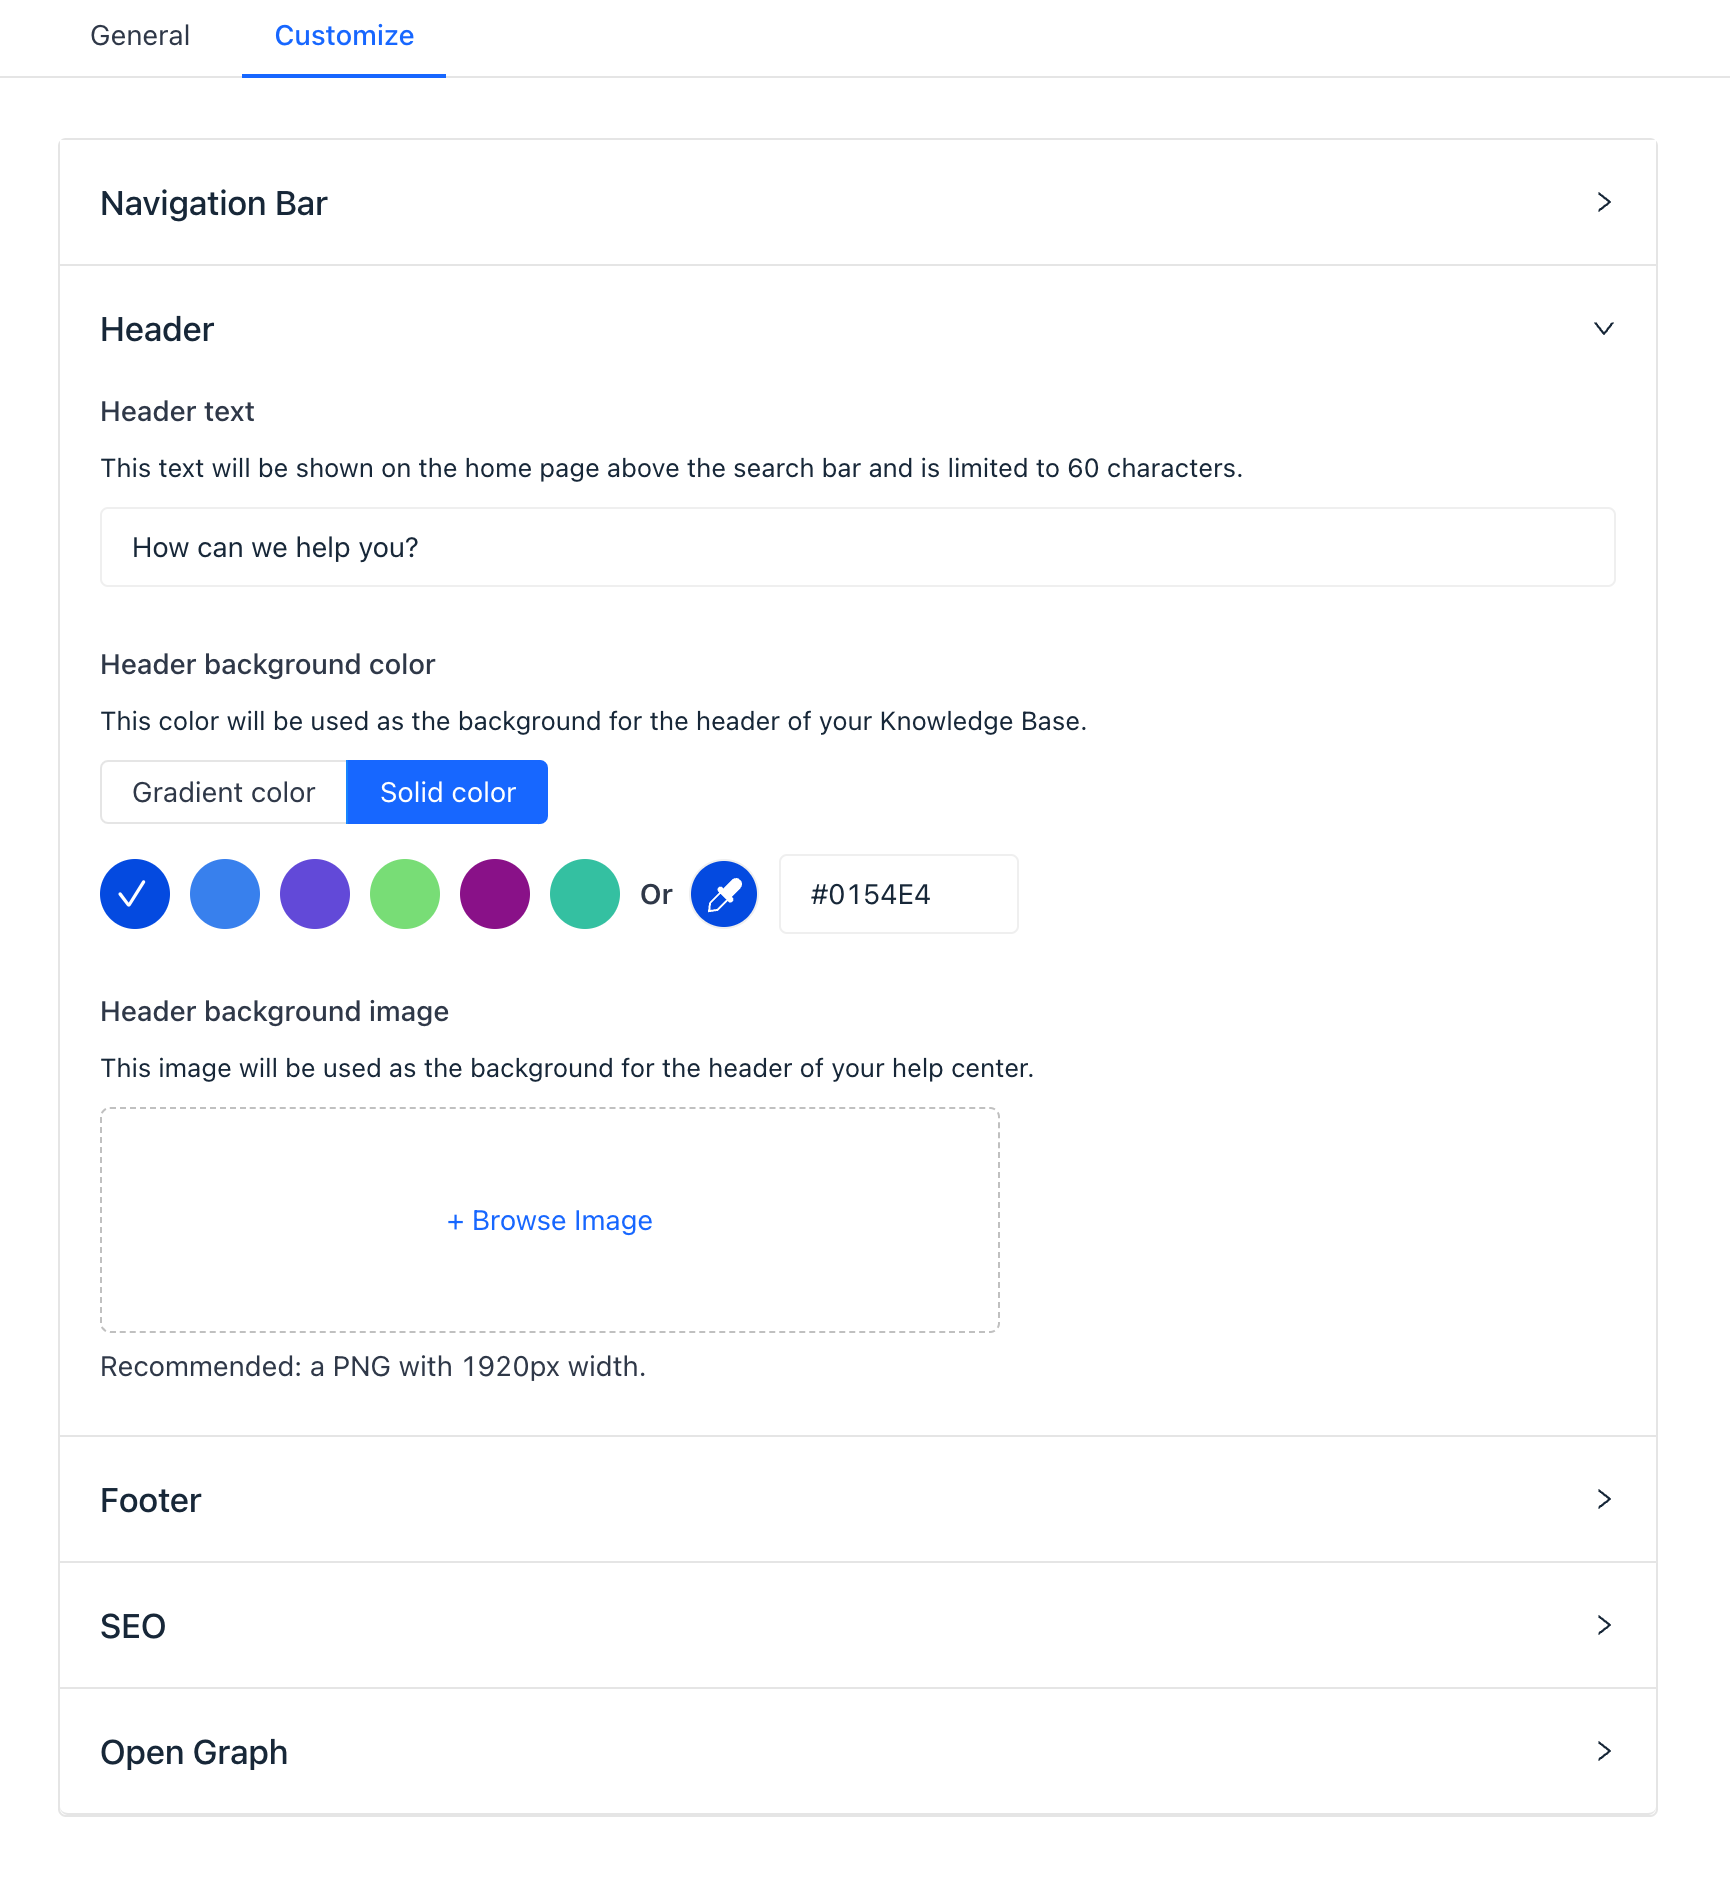
Customize your Knowledge Base to reflect your brand. This includes branding aspects, language selection, and adding links.
Navigate to Settings > Knowledge Base > General page.
Branding: Customize your Knowledge Base to match your brand's look and feel.
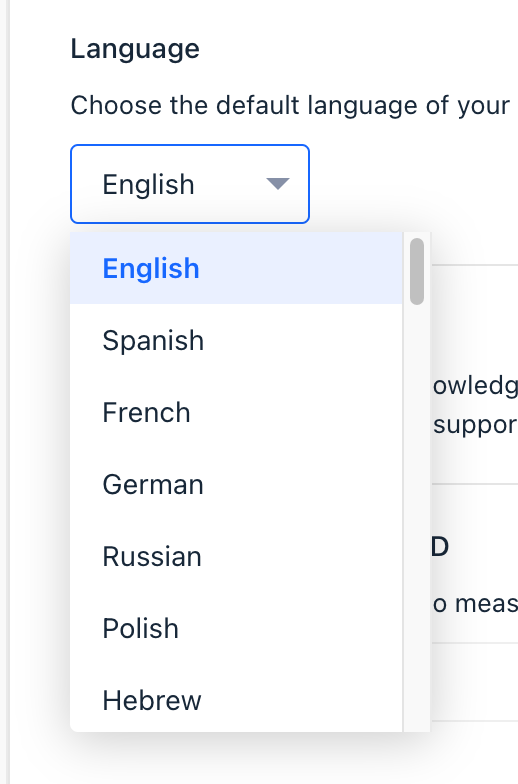
Language Selection: Choose a language for your Knowledge Base to cater to your target customer base.
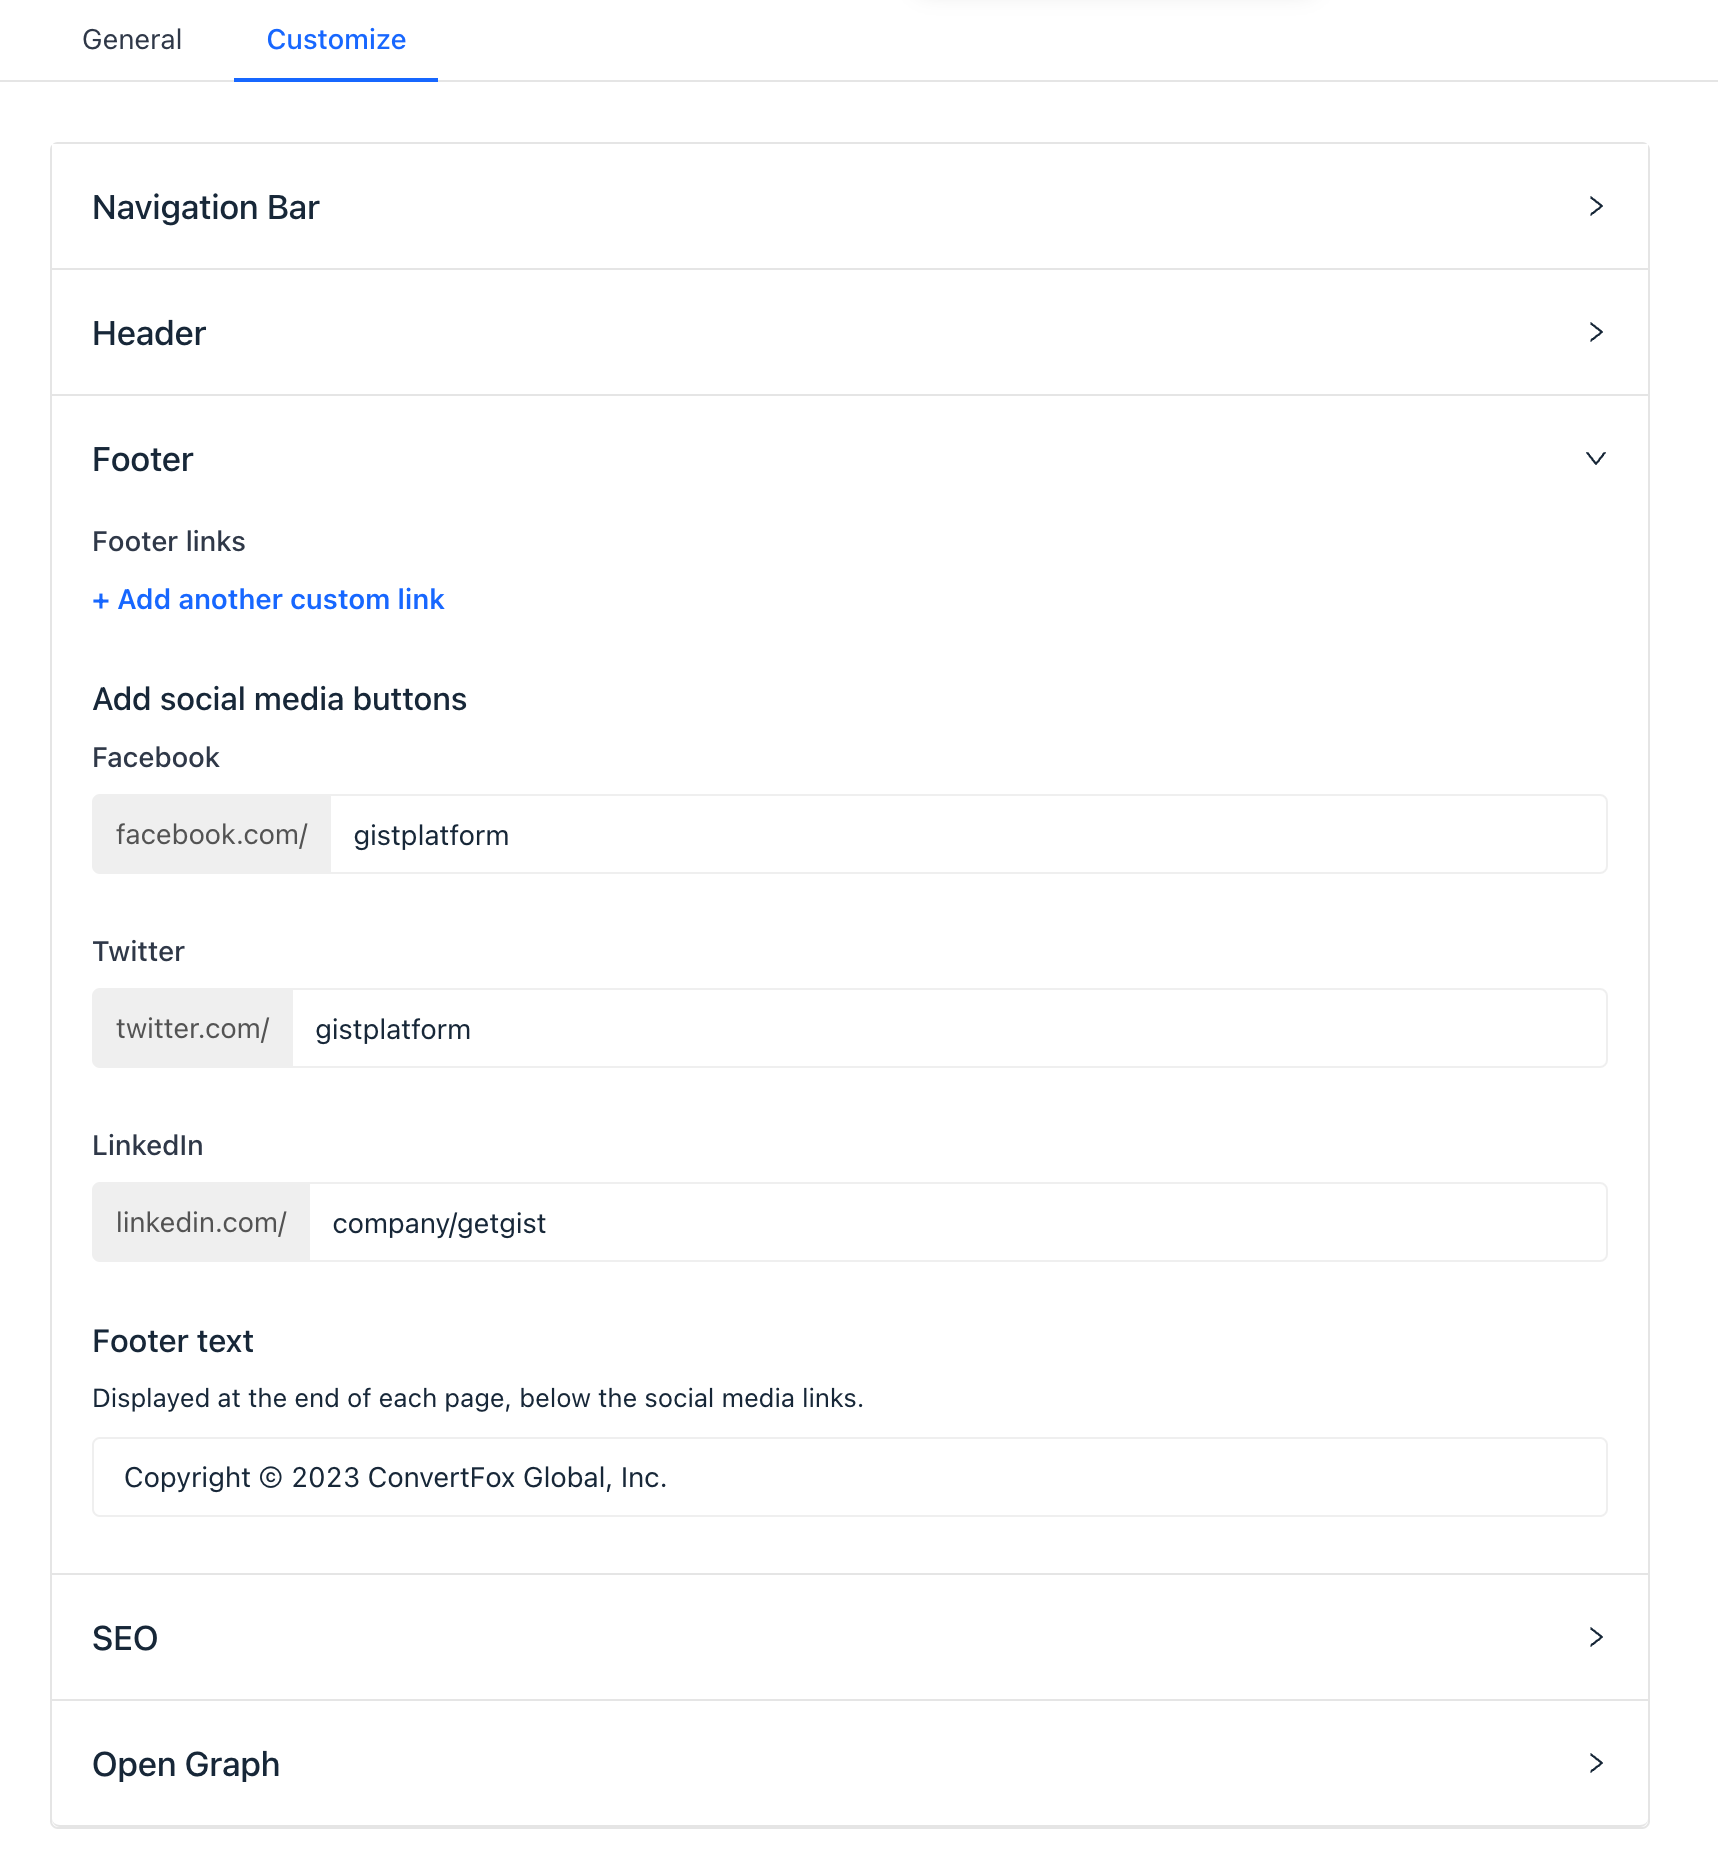
Adding Links: Add links to your website or social media accounts to connect your Knowledge Base to your broader online presence.
Google Analytics Integration: If you use Google Analytics, add your tracking ID to your Knowledge Base for insightful user interaction data.

3. Setting Up a Custom Domain (Optional)
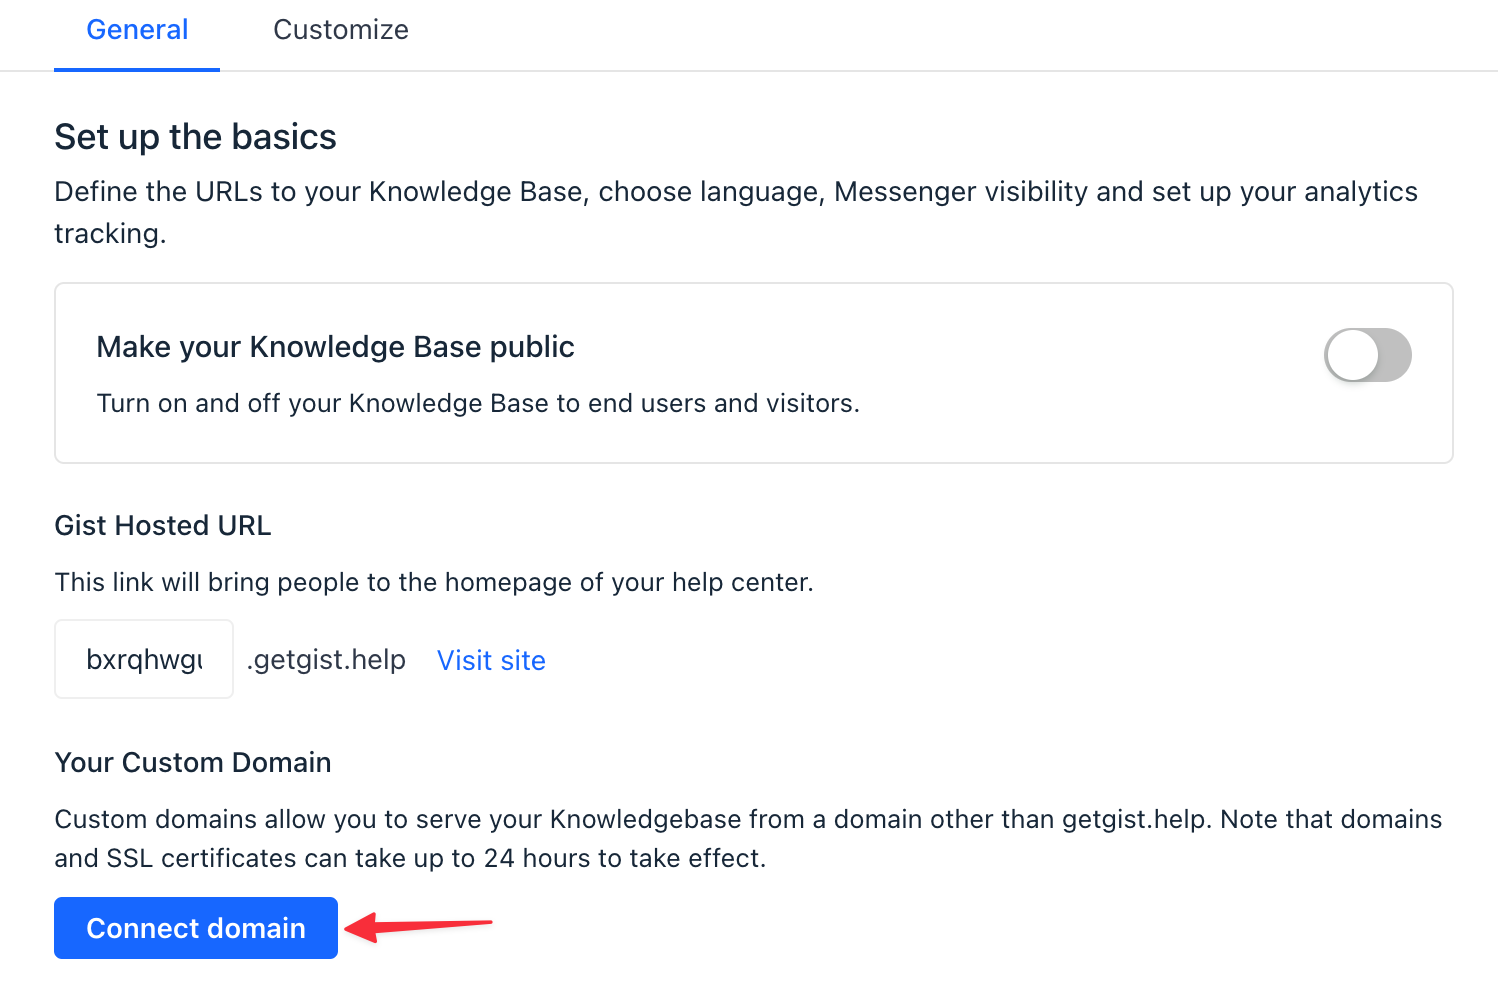
By default, your help content is accessible through a getgist.help domain. However, you can opt to have your Knowledge Base available via your own domain.
Enter Custom Domain: In your Knowledge Base settings, click Connect domain and enter your desired custom domain, like support.yourcompany.com.
Create a CNAME Record: Log in to your DNS provider or Domain registrar account and create a CNAME record that points your chosen subdomain to yourcompany.getgist.help.
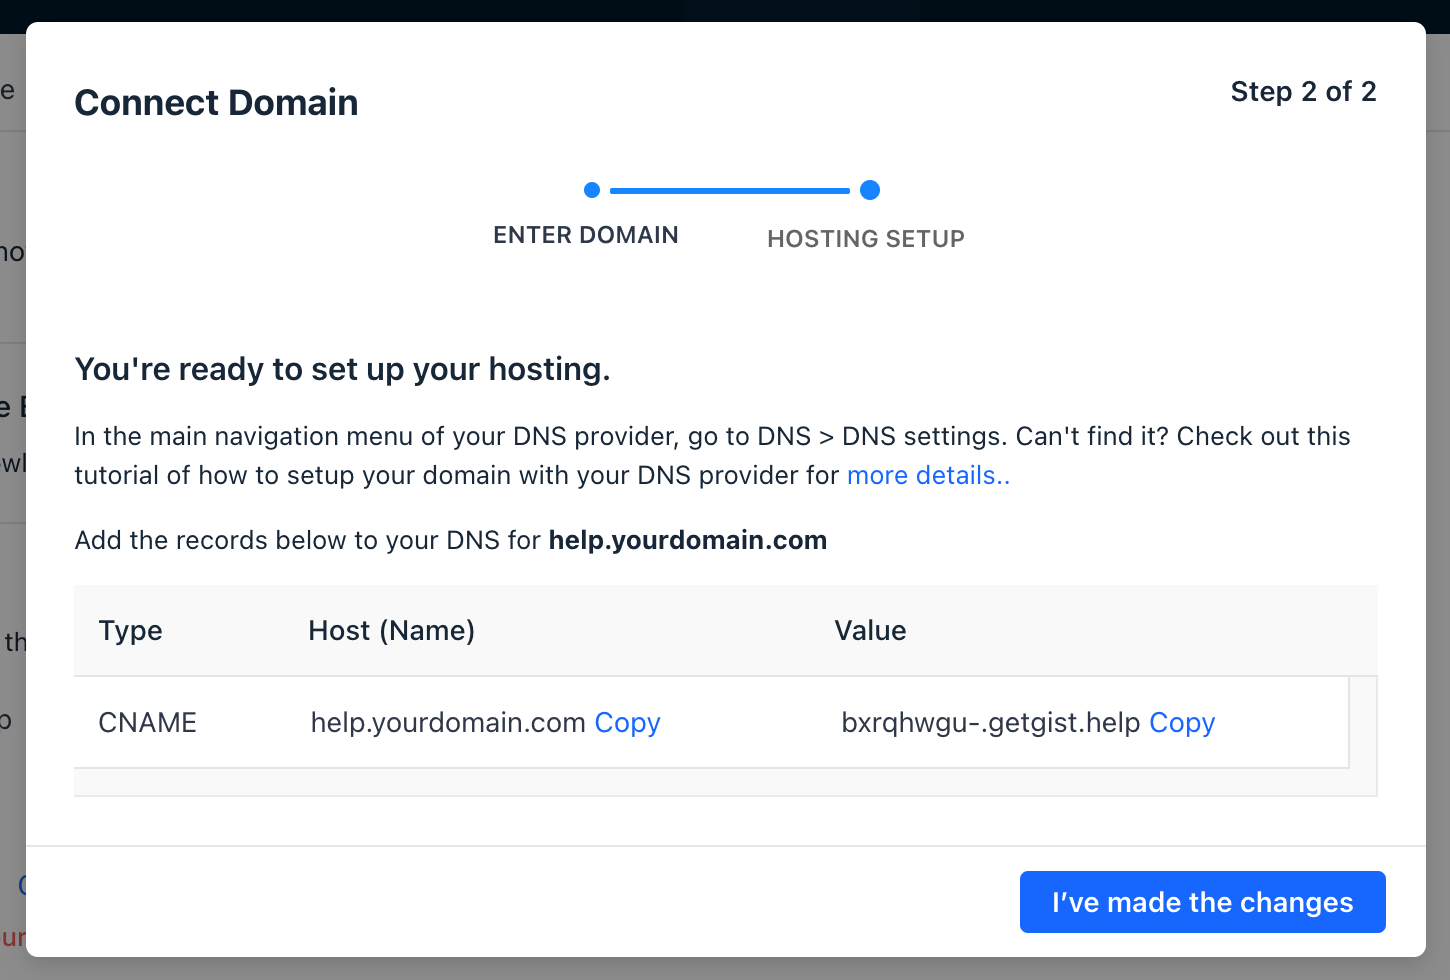
Note: DNS changes can sometimes take up to 72 hours to take effect.
Caution: If you're using Cloudflare to manage your DNS records, ensure the orange clouded icon is disabled. Otherwise, the DNS entries will not redirect properly, and SSL generation for your custom domain configuration will fail.
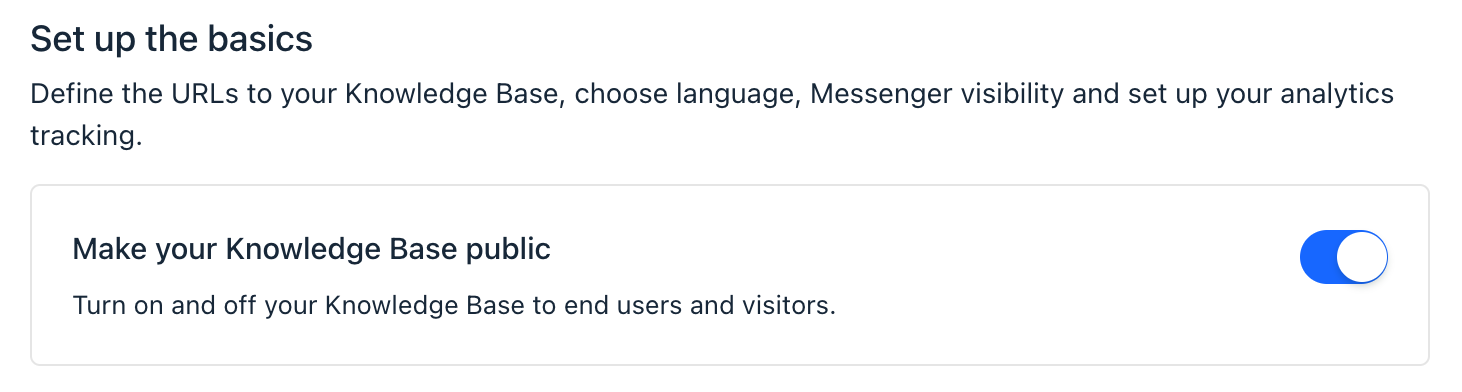
4. Turning Your Knowledge Base On
The final step to making your Knowledge Base public is to turn it on.
To do so, click the "Make your Knowledge Base public" option, and your Knowledge Base will be available to your customers. Your Knowledge Base will also become searchable on Google.
By implementing these steps, you'll have a well-structured, user-friendly Knowledge Base that not only improves customer support but also empowers your customers to find solutions independently.
Need Help?
If you have any further questions, start a Live Chat. Just "Click" on the Chat Icon in the lower right corner to talk with our support team.